Copied With Editing From The Old Site
All,
I spoke with Sales at Kisan and the model we need is the SM-3R "newer Honda model" with the 9 -pin connector.
While I had them on the line we discussed the "club discount" on their website and they quickly agreed to a 10% discount for the NT-Owners forum. That discount puts their OEM pricing in line with the resellers at $107.97 plus shipping. If anyone else orders one direct from Kisan make sure you include the NT-Owners forum name and the 10% "club discount" in the comments section.")
SM-3R Specifications
Installation Part One
The SM-3R is the correct model as it comes with the nine pin connector used on European Honda's like the NT. It is also pretty much ?plug and play? as far as wiring if you do not install the Brake Light Time Out and Vectra Light options. More on that ?pretty much? later...
Kisan makes a lot of claims about what this unit can do, and all of them are true. What isn't so clear is what you get with the additional features and how they can conflict, based on interactions with Honda?s wiring, and with each other...
Turn Signal Cancellation ? Yes, and you can set it for 10, 20 or seconds by flipping DIP switches on the unit. It comes preset for 10 seconds using DIP One, which also turns on the Running Lights option. DIP Two is 20 seconds, and DIP Three thirty seconds. I went with 20 seconds?
4 Way Emergency Flash Mode - This feature is preconfigured in the unit. They can be a bit annoying to turn on! You "Flick the turn signal switch four times to the right - about once a second". A second version of this feature "Escort Flash Mode" is also included. Activating it requires "flicking" to the left instead of the right. I can't tell much difference between "Emergency" and "Escort" modes....
Running Lights ? Yes, you get constant on Running Lights that power all your Turn Signal bulbs at about half power. They add visibility and look good on the NT. When the Turn Signal is in engaged the bulbs that are flashing are at full power, while the other side remains at half power.
But, you will also get the Turn Signal indicators on the dash being lighted constantly with the Running Lights. So if having the two Turn Indicators lit constantly bothers you you?ll need to turn off the running lights. This ?feature? is a ?Note? on the bottom of Page 25 of the installation manual. As the Note states the Indicators are wired in parallel with the Turn Signals so they will stay lit. I can live with the ?Green? lights glowing so this is not a big issue for me... Edit: I couldn't live with it and turned the Running Lights off...
Brake Input Option ? This option is used to suspend the Turn Signal Timer when the brakes are applied. With the long lights in metro Atlanta it seemed like a good idea so I hooked it up. It does suspend the Turn Signal Timer for as long as you apply the brakes.
Physical mounting: The SM-3R is not quite the same size as the factory unit but it will just fit in the original rubber mount. If you are adding any options like the Brake Input option or the Vectra lights both end must be accessible so you will need to open the bottom up.
About that ?pretty much plug and play? wiring comment. The SM-3R comes with a separate ground wire. Rather than extending the wire to reach the battery or an existing ground I added a ?ground stud? to the frame using an unused hole. This will allow me to ground other ?farkles? in the future. This was the longest part of the exercise as I had to run out to ACE Hardware for a couple of hardware parts...
I did not purchase the optional ?Return Springs to modify my Turn Signal switch for ?automatic cancellation and return to center?. I don't mind hitting the switch before the next use if I forget to cancel manually. I also did not purchase the Vectra mirror lights...
I took a few photos during the install to show how I installed the unit...

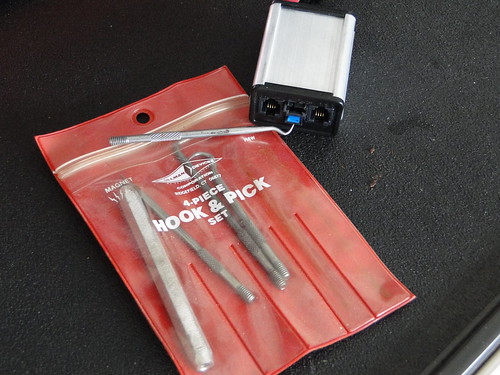
What You Get http://www.flickr.com/people/wecnwise/

Factory Turn Signal Flasher Location http://www.flickr.com/people/wecnwise/
Factory Unit and Mount Off The Frame Mounting Blade http://www.flickr.com/people/wecnwise/
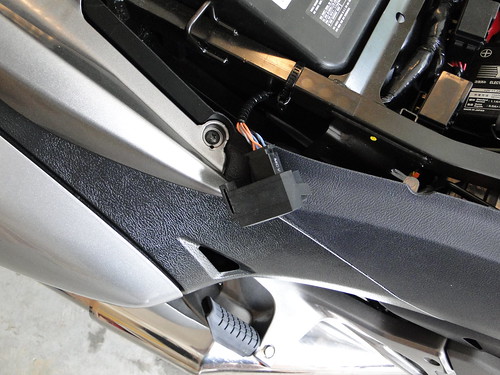
Before You Start Installing Remove The Blue Connector http://www.flickr.com/people/wecnwise/
Next the Ground Stud....
Part Two
As I mentioned I added a new Ground Stud during this install. I did not want to extend the SM-3R ground wire and I also will use this for other farkles.... There was a handy hole near by so I grabbed the Dremel to remove some of the paint then installed the stud...
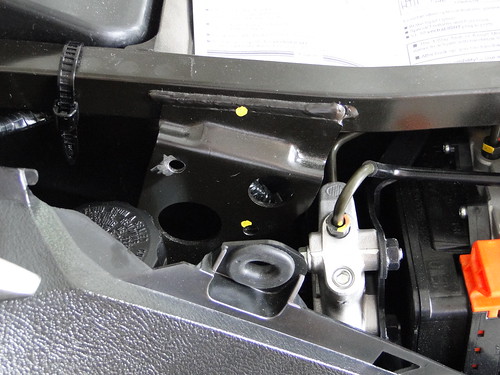
New Ground Stud Locationhttp://www.flickr.com/people/wecnwise/

Ground Stud Installed http://www.flickr.com/people/wecnwise/
There is still plenty of room to get to the rear brake system...
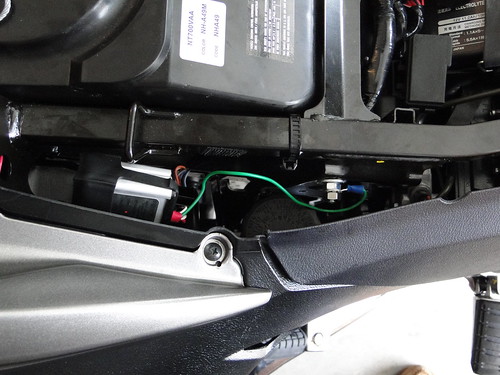
If you are going to use the Brake Input Option you can tap in, with the supplied connector, in the wiring tray just in front of the tail lights... Use the Green / Yellow brake wire as shown...

Brake Input Option Connection http://www.flickr.com/people/wecnwise/
Installation Complete Top View http://www.flickr.com/people/wecnwise/
Use a sharp knife to cut the bottom partially out of the OEM rubber holder so you can run the Brake Input wire...
Part Three
When you opt to use the Running Light Option this is how it looks:
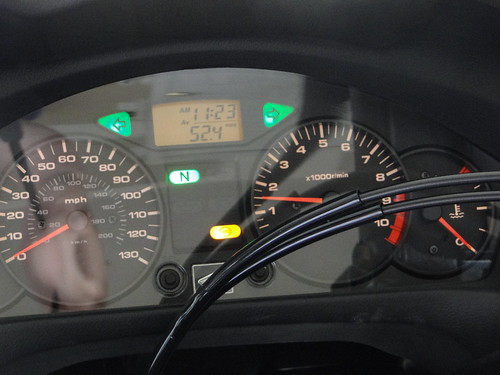
Cluster with Running Lights Only, No Turn Signal Activation http://www.flickr.com/people/wecnwise/
With the Left Turn Signal Activated:
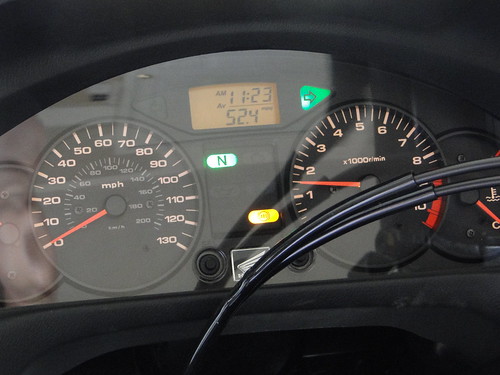
Cluster with Left Turn Signal Flashing Off Cycle http://www.flickr.com/people/wecnwise/
Left Turn From the Rear...
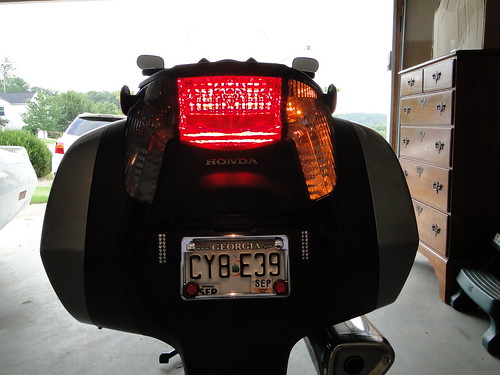
Left Turn Flashing, Off Flash Cycle, Right Rear Running Light http://www.flickr.com/people/wecnwise/
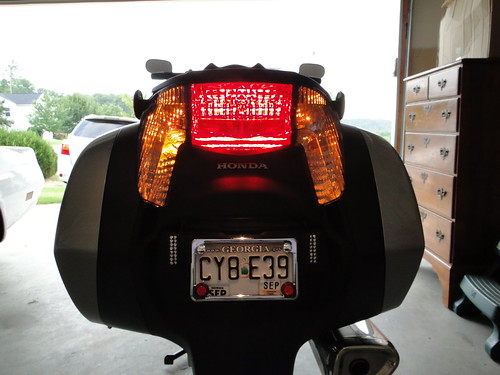
Left Turn On Flash Cycle, Right Rear Running Lighthttp://www.flickr.com/people/wecnwise/
Part Four
Now Rear Running Lights Only:
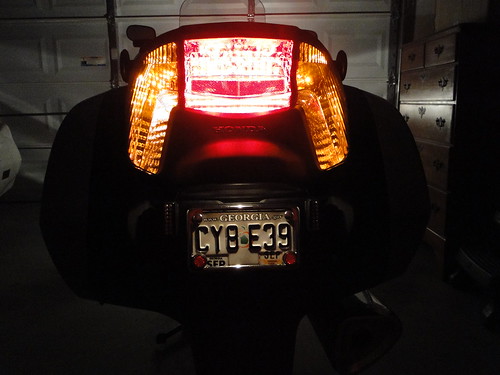
Rear Running Lights http://www.flickr.com/people/wecnwise/
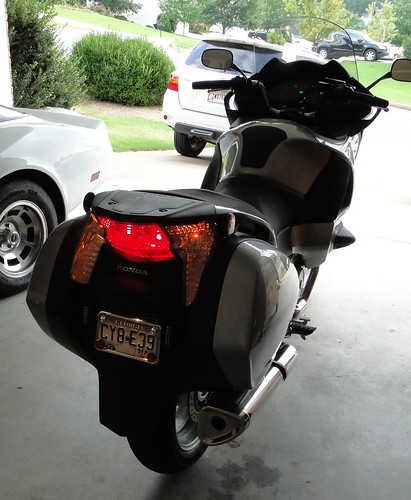
Rear Running Lights Offset View in Daylighthttp://www.flickr.com/people/wecnwise/
Now Front Running Lights:
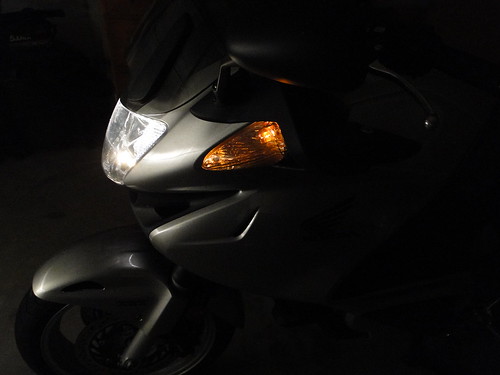
Left Front Running Light http://www.flickr.com/people/wecnwise/
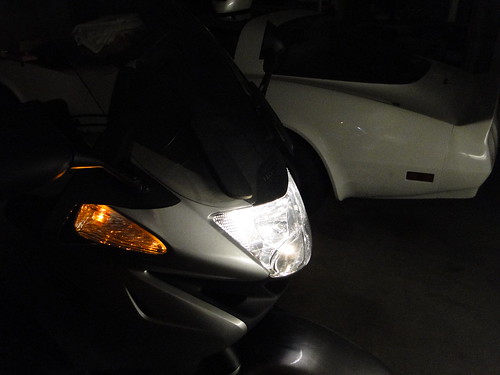
Right Front Running Light http://www.flickr.com/people/wecnwise/
Overall a nice farkle that adds some additional visibility and safety to the NT...
All,
I spoke with Sales at Kisan and the model we need is the SM-3R "newer Honda model" with the 9 -pin connector.
While I had them on the line we discussed the "club discount" on their website and they quickly agreed to a 10% discount for the NT-Owners forum. That discount puts their OEM pricing in line with the resellers at $107.97 plus shipping. If anyone else orders one direct from Kisan make sure you include the NT-Owners forum name and the 10% "club discount" in the comments section.
SM-3R Specifications
Installation Part One
The SM-3R is the correct model as it comes with the nine pin connector used on European Honda's like the NT. It is also pretty much ?plug and play? as far as wiring if you do not install the Brake Light Time Out and Vectra Light options. More on that ?pretty much? later...
Kisan makes a lot of claims about what this unit can do, and all of them are true. What isn't so clear is what you get with the additional features and how they can conflict, based on interactions with Honda?s wiring, and with each other...
Turn Signal Cancellation ? Yes, and you can set it for 10, 20 or seconds by flipping DIP switches on the unit. It comes preset for 10 seconds using DIP One, which also turns on the Running Lights option. DIP Two is 20 seconds, and DIP Three thirty seconds. I went with 20 seconds?
4 Way Emergency Flash Mode - This feature is preconfigured in the unit. They can be a bit annoying to turn on! You "Flick the turn signal switch four times to the right - about once a second". A second version of this feature "Escort Flash Mode" is also included. Activating it requires "flicking" to the left instead of the right. I can't tell much difference between "Emergency" and "Escort" modes....
Running Lights ? Yes, you get constant on Running Lights that power all your Turn Signal bulbs at about half power. They add visibility and look good on the NT. When the Turn Signal is in engaged the bulbs that are flashing are at full power, while the other side remains at half power.
But, you will also get the Turn Signal indicators on the dash being lighted constantly with the Running Lights. So if having the two Turn Indicators lit constantly bothers you you?ll need to turn off the running lights. This ?feature? is a ?Note? on the bottom of Page 25 of the installation manual. As the Note states the Indicators are wired in parallel with the Turn Signals so they will stay lit. I can live with the ?Green? lights glowing so this is not a big issue for me... Edit: I couldn't live with it and turned the Running Lights off...
Brake Input Option ? This option is used to suspend the Turn Signal Timer when the brakes are applied. With the long lights in metro Atlanta it seemed like a good idea so I hooked it up. It does suspend the Turn Signal Timer for as long as you apply the brakes.
Physical mounting: The SM-3R is not quite the same size as the factory unit but it will just fit in the original rubber mount. If you are adding any options like the Brake Input option or the Vectra lights both end must be accessible so you will need to open the bottom up.
About that ?pretty much plug and play? wiring comment. The SM-3R comes with a separate ground wire. Rather than extending the wire to reach the battery or an existing ground I added a ?ground stud? to the frame using an unused hole. This will allow me to ground other ?farkles? in the future. This was the longest part of the exercise as I had to run out to ACE Hardware for a couple of hardware parts...
I did not purchase the optional ?Return Springs to modify my Turn Signal switch for ?automatic cancellation and return to center?. I don't mind hitting the switch before the next use if I forget to cancel manually. I also did not purchase the Vectra mirror lights...
I took a few photos during the install to show how I installed the unit...
What You Get http://www.flickr.com/people/wecnwise/
Factory Turn Signal Flasher Location http://www.flickr.com/people/wecnwise/
Factory Unit and Mount Off The Frame Mounting Blade http://www.flickr.com/people/wecnwise/
Before You Start Installing Remove The Blue Connector http://www.flickr.com/people/wecnwise/
Next the Ground Stud....
Part Two
As I mentioned I added a new Ground Stud during this install. I did not want to extend the SM-3R ground wire and I also will use this for other farkles.... There was a handy hole near by so I grabbed the Dremel to remove some of the paint then installed the stud...
New Ground Stud Locationhttp://www.flickr.com/people/wecnwise/
Ground Stud Installed http://www.flickr.com/people/wecnwise/
There is still plenty of room to get to the rear brake system...
If you are going to use the Brake Input Option you can tap in, with the supplied connector, in the wiring tray just in front of the tail lights... Use the Green / Yellow brake wire as shown...
Brake Input Option Connection http://www.flickr.com/people/wecnwise/
Installation Complete Top View http://www.flickr.com/people/wecnwise/
Use a sharp knife to cut the bottom partially out of the OEM rubber holder so you can run the Brake Input wire...
Part Three
When you opt to use the Running Light Option this is how it looks:
Cluster with Running Lights Only, No Turn Signal Activation http://www.flickr.com/people/wecnwise/
With the Left Turn Signal Activated:
Cluster with Left Turn Signal Flashing Off Cycle http://www.flickr.com/people/wecnwise/
Left Turn From the Rear...
Left Turn Flashing, Off Flash Cycle, Right Rear Running Light http://www.flickr.com/people/wecnwise/
Left Turn On Flash Cycle, Right Rear Running Lighthttp://www.flickr.com/people/wecnwise/
Part Four
Now Rear Running Lights Only:
Rear Running Lights http://www.flickr.com/people/wecnwise/
Rear Running Lights Offset View in Daylighthttp://www.flickr.com/people/wecnwise/
Now Front Running Lights:
Left Front Running Light http://www.flickr.com/people/wecnwise/
Right Front Running Light http://www.flickr.com/people/wecnwise/
Overall a nice farkle that adds some additional visibility and safety to the NT...
Last edited: