[How To] Valve Clearance Check

DirtFlier

Site Supporter
Joined
Dec 13, 2010
Messages
3,342
Location
Troy, OH
Bike
2010 Silver NT700V/ABS
Now that I have a 2nd bike (NC700XD) my NT doesn't get ridden as much. Checking my records I found that I last checked the valves on July 2017 with the odometer at 61k miles. Now 4 yrs, 2 months later and the odometer reads 78k miles. My NC was bought in late-2015 used with less than 1000 miles on it and it now has 36k miles. :)

The removal of plastic and other stuff went quickly and I organized all the fasteners on a baking tray keeping them in separate piles to help speed reassembly. I was done in around 4+ hours, start to finish, and I only found one exhaust valve slightly loose but still inside the +/- tolerance range so I left it as-is.

Although it's somewhat backwards to do the rear cyl first and contrary to the service manual sequence, I always to the rear first because removing that rear cover is so easy. Once I was done I removed the throttle bodies, then the front cover with the crank was still in "TR" position for adjusting the rear cyl. What I found was that with the crank in that position, the exhaust rockers for the front cyl were DOWN so it made removing the front cover much, much easier! Previously I'd had always turned the crank to "TF" first which put the ex rockers UP and made cover removal a situation that filled my garage air with cuss words!

While I had everything apart and before I started reassembly, I disconnected, cleaned and lubed all the critical connectors which included the Throttle Position Sensor.

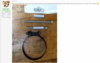
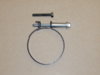
When the NT was new, one thing that bugged me about this job was loosening/tightening the screw for the clamp that holds the front throttle body to the cyl head. The rear clamp screw is in plain view but the front clamp screw is buried in a maze of wires and hoses. There was so much friction from using a long extension that rubbed on the hoses that I never knew if I was turning the screw! I solved this long ago by making a much longer than normal screw and spacer for that clamp so now it's an easy job because I can see the screw head.
 

Attachments

Last edited:
Joined
Aug 25, 2012
Messages
445
Location
Genoa, IL, USA
Bike
2010 Red NT700V
Once you've done some valve adjustments on the NT, they really seem to stay in spec, I've noticed this too. I'm OK with pushing out the interval to 32k at this point.

Good point on parking the engine with the front exhaust valves open, it does help with front cover.
 

mikesim

Site Supporter
Joined
Jun 7, 2011
Messages
3,374
Age
74
Location
Union, MO
Bike
NT700, Red, #989,
Good point on parking the engine with the front exhaust valves open, it does help with front cover.
Now he tells us!! Great idea!! I never woulda thunk to do that. Sadly, I usually follow the instructions in the service manual (some would say slavishly) to the letter. It pays to think outside the box at times. Now, I just gotta remember to do this the next time I check the valves.... rememberin'....... no small trick anymore..... <sigh>....

Mike
 
OP
OP
DirtFlier

DirtFlier

Site Supporter
Joined
Dec 13, 2010
Messages
3,342
Location
Troy, OH
Bike
2010 Silver NT700V/ABS
MikeSim - I have the same disease. I often do things and partway through remember that I made up a better procedure for that task or even made a special tool just to help with that function. :-(
 
Joined
Aug 25, 2012
Messages
445
Location
Genoa, IL, USA
Bike
2010 Red NT700V
Interesting observation, with the crank in the TR position, the front exhaust valves are open? Guess that makes sense, with the NT engine essentially being a 90 degree v-twin, with its offset connecting rod journals.

As Mike said, sometimes thinking outside the manual is in order. I've never had the side cover plugs out on my NT, the center one is frozen solid anyways. I just use the timing marks stamped on the cam gears, and with the spark plugs out I stick a plastic straw in the spark plug hole to locate piston TDC. You can bring the engine close to TDC with the starter, and with the transmission in 5th, you can bump the back wheel by hand until the cam gear marks are level with the valve cover gasket surface. If you find both rocker arm are tight at this point, you are on valve overlap, take the crank around one full turn and you are now at firing TDC. Easy-peazy, and no messing with the side cover plugs.
 
OP
OP
DirtFlier

DirtFlier

Site Supporter
Joined
Dec 13, 2010
Messages
3,342
Location
Troy, OH
Bike
2010 Silver NT700V/ABS
Yes, one of my big fears during disassembly were the two access/observation plugs on the left side of the engine but fortunately they came out easily without having to resort to a chisel & hammer. I've been putting never seize on the threads of those caps and not making them super tight. :cool:
 

Coyote Chris

Site Supporter
Joined
Aug 25, 2011
Messages
4,435
Location
Spokane
Bike
10 Red NT 14 FJR, 17 XT
See my threads on setting valves. I made the extended hose clamp assembly with a spacer which did wonderful things. Also, you are wise to do the rear cylinder first, button it back up, and just put the throttle bodies on top of the rear cylinder. My view on my bike was that after 2-3 checks, you could easily double the interval.
a clamp.jpg
 

Coyote Chris

Site Supporter
Joined
Aug 25, 2011
Messages
4,435
Location
Spokane
Bike
10 Red NT 14 FJR, 17 XT
Interesting observation, with the crank in the TR position, the front exhaust valves are open? Guess that makes sense, with the NT engine essentially being a 90 degree v-twin, with its offset connecting rod journals.

As Mike said, sometimes thinking outside the manual is in order. I've never had the side cover plugs out on my NT, the center one is frozen solid anyways. I just use the timing marks stamped on the cam gears, and with the spark plugs out I stick a plastic straw in the spark plug hole to locate piston TDC. You can bring the engine close to TDC with the starter, and with the transmission in 5th, you can bump the back wheel by hand until the cam gear marks are level with the valve cover gasket surface. If you find both rocker arm are tight at this point, you are on valve overlap, take the crank around one full turn and you are now at firing TDC. Easy-peazy, and no messing with the side cover plugs.
Good advice. I have been known to just look at the cam lob and a screw adjuster and their relationship and check valves that way. Think about it. Most of the cam lobe "circle" if you will would have to be equadistant to the adjuster for the "double TDC" meathod to work on say my inline four cylinders....with the plugs out on certain bikes, I just turned the engine by putting the bike in a high gear and turning the rear wheel.
cam lobe profinle.jpg
 

Phil Tarman

Site Supporter
Moderator
Joined
Dec 12, 2010
Messages
9,372
Age
81
Location
Greeley, CO
Bike
2010 Silver NT700VA (ABS)
Coyote Chris said: Think about it. Most of the cam lobe "circle" if you will would have to be equadistant to the adjuster for the "double TDC" meathod to work on say my inline four cylinders....with the plugs out on certain bikes, I just turned the engine by putting the bike in a high gear and turning the rear wheel.

That's the way I always adjusted the valves on my C10 Concours.
 
OP
OP
DirtFlier

DirtFlier

Site Supporter
Joined
Dec 13, 2010
Messages
3,342
Location
Troy, OH
Bike
2010 Silver NT700V/ABS
There is a system for setting certain valves on certain cylinders then turning the crank a small amount and doing another valve on another cylinder but I could never remember that system! I just find TDC for each cylinder and I'm not working on flat rate anyhow so the extra time spent doesn't matter. :)

Chris - there is a dimension for the minimum distance between the ends of the clamp and long ago the Honda clamps came with a spacer in that gap. The spacer prevents the clamp from being overtightened so I made spacers for both my clamps. The spec (12 mm +/- 1 mm) is in the service manual. Finding a 1/2" long spacer with a 1/4" i.d. should be pretty easy.
 
Last edited:

Coyote Chris

Site Supporter
Joined
Aug 25, 2011
Messages
4,435
Location
Spokane
Bike
10 Red NT 14 FJR, 17 XT
There is a system for setting certain valves on certain cylinders then turning the crank a small amount and doing another valve on another cylinder but I could never remember that system! I just find TDC for each cylinder and I'm not working on flat rate anyhow so the extra time spent doesn't matter. :)

Chris - there is a dimension for the minimum distance between the ends of the clamp and long ago the Honda clamps came with a spacer in that gap. The spacer prevents the clamp from being overtightened so I made spacers for both my clamps. The spec (12 mm +/- 1 mm) is in the service manual. Finding a 1/2" long spacer with a 1/4" i.d. should be pretty easy.
Ahhh....if only I had kept my bike!
:)
 
Top Bottom