OP
OP
Horizon
Guest
Here is some more info and pics for those facing similar issues with misbehaving pannier lids.
Attached pictures:
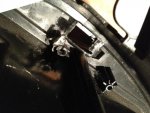
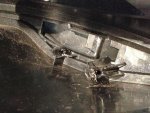
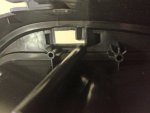
- (x4) The broken black plastic posts the steel pannier locking mechanism screws to (or did once upon a time).
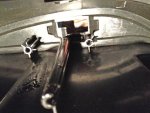
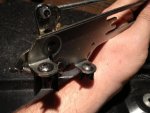
- (x2) The latch mechanism with some broken post sections still screwed on.
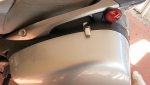
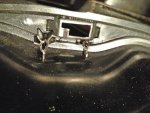
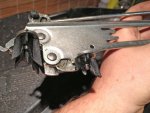
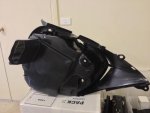
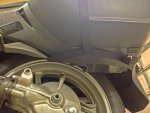
- (x1) The bike pulled apart when I first tried to repair the issue without much result.
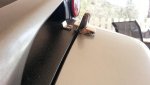
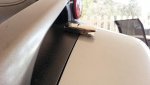
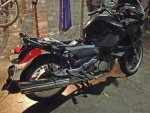
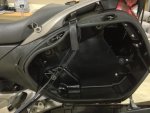
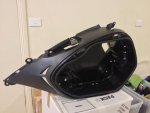
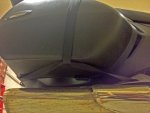
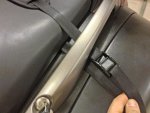
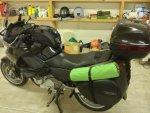
- (x1) The pannier on the bike (you may notice some extra strapping which I will explain in the next post)
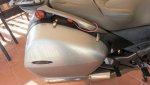
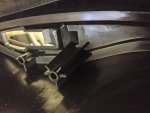
- (x4) The new panniers that have arrived (thanx to MRCycles.com) and also what the new unbroken posts look like inside.
There are 4 screws per side and all of mine where either split or totally broken and smashed. If yours are only split then they may be salvageable with some epoxy or adhesive. I bought the bike with some of these issues but Im sure I made it worse as I grew more impatient with the bloody things...WARNING...forcing it or pushing hard will not EVER solve the problem if your latches are even slightly shifting out of alignment.
Those of you that have a new bike or perfectly working latches will never know our pain
As explained in earlier posts, Honda has two different part numbers per pannier side (supposedly to reflect the earlier pre 2010 Euro/Australasian models and then the newer US models), I purchased the newer part number and Im disappointed to report that at first glance there does not seem to be any difference and certainly no evidence of a stronger or new improved screw post design. When I come to install the new panniers I will take some pics of how I reinforce them in an attempt to make them indestructible.
Attached pictures:
- (x4) The broken black plastic posts the steel pannier locking mechanism screws to (or did once upon a time).
- (x2) The latch mechanism with some broken post sections still screwed on.
- (x1) The bike pulled apart when I first tried to repair the issue without much result.
- (x1) The pannier on the bike (you may notice some extra strapping which I will explain in the next post)
- (x4) The new panniers that have arrived (thanx to MRCycles.com) and also what the new unbroken posts look like inside.
There are 4 screws per side and all of mine where either split or totally broken and smashed. If yours are only split then they may be salvageable with some epoxy or adhesive. I bought the bike with some of these issues but Im sure I made it worse as I grew more impatient with the bloody things...WARNING...forcing it or pushing hard will not EVER solve the problem if your latches are even slightly shifting out of alignment.
Those of you that have a new bike or perfectly working latches will never know our pain
As explained in earlier posts, Honda has two different part numbers per pannier side (supposedly to reflect the earlier pre 2010 Euro/Australasian models and then the newer US models), I purchased the newer part number and Im disappointed to report that at first glance there does not seem to be any difference and certainly no evidence of a stronger or new improved screw post design. When I come to install the new panniers I will take some pics of how I reinforce them in an attempt to make them indestructible.
Attachments
-
 58.2 KB Views: 90
 -
 65.7 KB Views: 107
 -
 74.2 KB Views: 68
 -
 89 KB Views: 68
 -
 76.8 KB Views: 78
 -
 58.5 KB Views: 62
 -
 54.2 KB Views: 59
 -
 53.2 KB Views: 63
 -
 38.7 KB Views: 55
 -
 35.2 KB Views: 55
 -
 45.7 KB Views: 64
 -
 55.4 KB Views: 78
Last edited by a moderator:


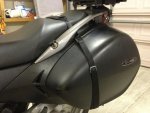
 The new inner panniers went on the bike and as far as functionality goes, I am 90% happy. The left side closes with single finger press and a very satisfying click and opens with an almost youthful vigour. The right side is almost as good but does require a little pressure to close. Im not sure why, maybe it will settle as the rubber seal softens. I decided not to reinforce the inner pannier posts with much more than drizzling some epoxy down then to thicken things up. I did the same for the lids where the latches screw in (some fine cracks where appearing here also).