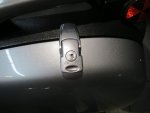
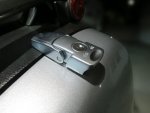
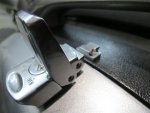
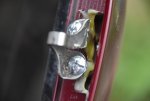
I've looked through most of the posts and have not found a similar solution. My first latch broke a couple days before my 1 year was up, so I was able to get it replaced under warranty. However, it did cost me to have the pin stripes put on the new lid. When the latch broke the second time, I needed to fix it myself. I noticed that there was space on the underside of the plastic where the metal latch is screwed in. I saved all the pieces and glued them back in their original positions with 5 min epoxy. I smeared a bunch of epoxy all around the outside of the plastic to give it more strength. I then drilled a hole all the way through the plastic coming out in the empty space (both sides of the latch), being very careful to start small and then get bigger. Bought bolts and nuts of the correct length (don't remember just what it was, probably 1 1/4 inch), and bolted the latch back in place. Since one of the bolts is very close to the inner side of the lid, I had to grind one side of the nut off a bit so it wouldn't hit the lid. Also then put a dab of glue on the bottom threads to keep the nut from getting loose. I really think that there is enough plastic with this method to prevent it from breaking again. At some point, I will do the other 3 latches. (hope the pic uploaded correctly).
Attachments
-
 82.5 KB Views: 76