I was removing my rear tire and made the mistake(I think) of removing the axle first before loosening the rear caliper stopper bolt. The bolt was very hard to move so I made a second mistake(I think) and used and extension to really torque it. I discovered my initial mistake, put the axle back in but now I can move the stopper bolt either way without great torque effort. I fear I've stripped it!!! Help! advice?
Rear Caliper Stopper Bolt Problem
- Thread starter Herb
- Start date
Mellow
Admin
I don't know what that area looks like but can you get a propane torch in there to heat the surrounding metal just a bit? I assume it's aluminum so I don't even know if that's a good idea.
Me, I'm not too bright so I'd probably just muscle it and see what happens.
Me, I'm not too bright so I'd probably just muscle it and see what happens.
elizilla
Guest
Herb, can you go out to one of the parts catalog sites, like this one, and tell us which bolt it is? If you tell us which page to look at, and what number it is on the diagram, we might be able to advise.
If it really is stripped, you can probably fix it with a helicoil. It will be a big nuisance, but it's not the end of the world and it's not beyond the skills of a guy who can get the rear wheel off of an NT.")
If it really is stripped, you can probably fix it with a helicoil. It will be a big nuisance, but it's not the end of the world and it's not beyond the skills of a guy who can get the rear wheel off of an NT.
RedBird
Site Supporter
Here's a second for the helicoil method. I used it on a VW cylinder head (aluminum) and it worked just fine. Another option, if there is enough metal surrounding the hole(s), is to tap the hole to the next larger size and drill out any other holes that the bolt passes through so the larger bolt can also.
OP
OP
Thanks for the responses.... the bolt in question attaches the rear brake caliper to the swing arm. I think my mistake was taking out the axle BEFORE loosening this bolt which I think put wheel weight on it making it difficult to turn.... and then when it didn't turn with normal pressure,using an extension to really torq it around. Right now it's still stuck and can't easily go back in or out! What I'm hearing is to go ahead and power it out not worrying about the threads and then go back in with this helicoil thing? Saw the video and it seems very doable. Is that right?
elizilla
Guest
I am not entirely sure I understand which bolt it is, still. IIRC, the brake caliper doesn't attach to the swingarm - it attaches to a sort of carrier bracket, which attaches to the swingarm. Is this bolt holding the bracket to the swingarm, or the caliper to the bracket?
If you go to that parts catalog, and go to the page for the REAR BRAKE CALIPER, is this part #17? If so, that appears to be one of the special pin-type bolts that are common in brakes, and it only has threads on the third of the bolt that is closest to the head. Once you unscrew those, it should just pull out the rest of the way. Could you have it turned far enough to come out of the threads, but the sliding pin section is still in the hole, perhaps with a bunch of grease sucking at it and making it feel like it's stuck, but if you just pulled hard enough it would slide out? Maybe there's nothing really wrong.
Do you have the exhaust off? Can you see what's in there or are you doing this by feel?
I'm not gonna tell you to take a drill to it, until I am sure I understand the issue!
Last edited by a moderator:
elizilla
Guest
If it is bolt #17, the threads are in the bracket, not the swingarm. So if the whole heli-coil thing goes pear shaped, or if you decide it's not for you, that part is $95. Which is a bite, but it's not like having to get a new swingarm. Also, since the part can be altogether removed, you can heli-coil it on the bench, rather than having to struggle with it under the bike.
OP
OP
Yes, Katherine it is part #17. I was making progress getting it out until it started pouring rain. Since I remove my rear tire by hanging the back end out of my shed, the rain was adding to my woes. It was time for a glass of wine.
I'm having trouble figuring out why this thing is so difficult to remove? My theory that removing the axle first somehow put more strain on this bolt seems unlikely. It just holds the rear caliber in place. Maybe not stripped after all but why so hard? Corrosion from my winter riding?
I didn't remove the muffler... I follow a lazy Brits suggestion to use an open wrench to remove axle and this stopper bolt. Sure saved me time but maybe I need to remove it tomorrow as I get to work on removing this bolt and see what I need to do. Tomorrow is another day. Thanks.
Lock Tight??. For my ST1300 the books says to replace the stopper bolt each time it is removed, Becouse the new ones come with Locktight on them. I just clean the old one and add new loctight to it.
I have not removed the rear wheel on my NT yet. In about 200 more miles it will need to come off for a tire change.
I have not removed the rear wheel on my NT yet. In about 200 more miles it will need to come off for a tire change.
Herb,
If I understand which part it is believe the threads are in the swingarm not the bracket. You still need it removed but if the threads are in the swingarm the fix may be harder.
I went to the garage and removed mine. It was tight. There are only 1/4 to 3/8 inch of threads on the stopper bolt and the rest is a pin to keep the caliper from spinning from the force. Hopefully you just have some corrosion or maybe a ridge has worn on the pin section to make it difficult to remove.
Good luck.
Brad
OP
OP
I got the stopper bolt out after 9 holes of golf... good for my mind. Yes, a teacher's life in the summer is tough. It was just corroded and really, really hard to turn out. It was especially hard to move it out once it was off the threads. I did mangle the bolt threads to pry it out as I was turning it and have ordered a new stopper bolt. Hopefully the swing arm threads are fine. We'll see.
I did take off the muffler which wasn't as bad as I thought it was going to be. Now getting it back on..... thanks. Now the tire change!
I did take off the muffler which wasn't as bad as I thought it was going to be. Now getting it back on..... thanks. Now the tire change!
The simple fix is to go to your local Honda shop and simply say here..........Saves knees, skin on the knuckles, prevents naughty words, no grease on the new shirt and so on................Bob
Ahh, but it does not save money and does not allow one to become one with their motorcycle. In today?s day and age one must be frugal.
OP
OP
Amen. I also like adventures and wrench work is definitely one.Ahh, but it does not save money and does not allow one to become one with their motorcycle. In today’s day and age one must be frugal.
elizilla
Guest
By doing it myself at home, I make myself more self-sufficient away from home. And I want to go places. So I wrench at home.
bicyclist
Guest
I agree. Doing your own work allows you to become familiar with the machine and the procedures necessary to work on it. You know exactly what has been done and how well. You can keep track of what is wearing or deteriorating. And it's less expensive.
OP
OP
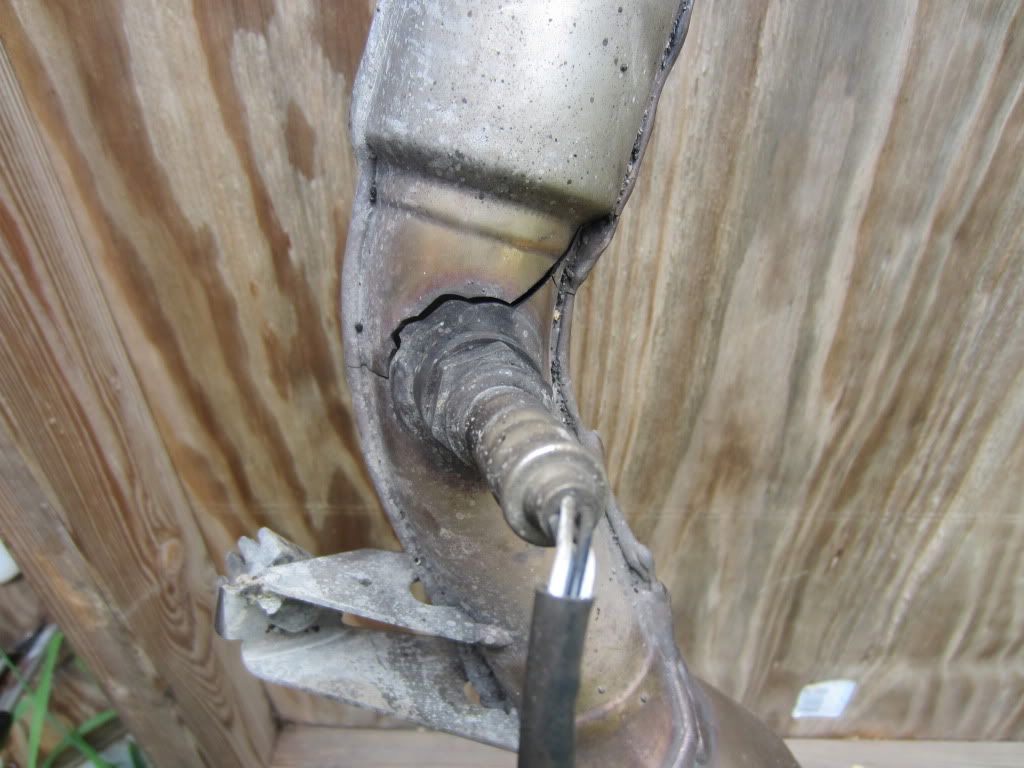
I had to wait for a new caliper stopper bolt to arrive and was reassembling the bike and all excited when I noticed that the muffler had a crack in it next to the O2 sensor. I don't think this happened in disassembly.... more likely a while back I discovered that the rear muffler fastener bolt had fallen out putting extra stress on the muffler... I could hear the difference which alerted me to search for the problem. No telling how long I rode it that way.
I'm ordering a new one but here's my question: I really need to get this bike back into action. We only have one car. Can I ride as is(I'm assuming that I probably was riding it with crack before changing the tire? Can I put some temporary type of seal there to allow me to ride until the new muffler arrives?
I'm ordering a new one but here's my question: I really need to get this bike back into action. We only have one car. Can I ride as is(I'm assuming that I probably was riding it with crack before changing the tire? Can I put some temporary type of seal there to allow me to ride until the new muffler arrives?
I don't see it as being a problem for a few days untill your replacement comes in. As long as it does not fall off going down the road. You can always use and old beer can and clamp to cover the crack. or you couild take it to a welding / muffler shop and have them weld up the crack. It is covered by the heat shield anyway, so it won't show. That muffler has to be expensive. Can you post a picture of it?
Last edited:
OP
OP
Here's a picture/
OP
OP
Yikes, Bikebandit has a new muffler listed for $779! It's not midas!