Removing real wheel on ABS 2011 NT

Joined
Apr 7, 2012
Messages
70
Location
Pensacola, Florida
Removing rear wheel on ABS 2011 NT

I just replaced my OEM tires with PR3s . . . and wanted to get this note here before I go to test them. The sun is shining and it's 66 degrees here, so I won't be back any time soon . . . if I didn't screw something up.

Anyway, the front wheel was very easy . . . but the rear was a real challenge. After hours of trying different things I think I found the solution and want to share it here. The wheel went back on in about twenty minutes. I think it would have taken even less to remove it had I done the below initially. For those without a lift with a drop gate for the rear wheel, many here have described clever ways to accomplish the same thing.

Rear Wheel removal


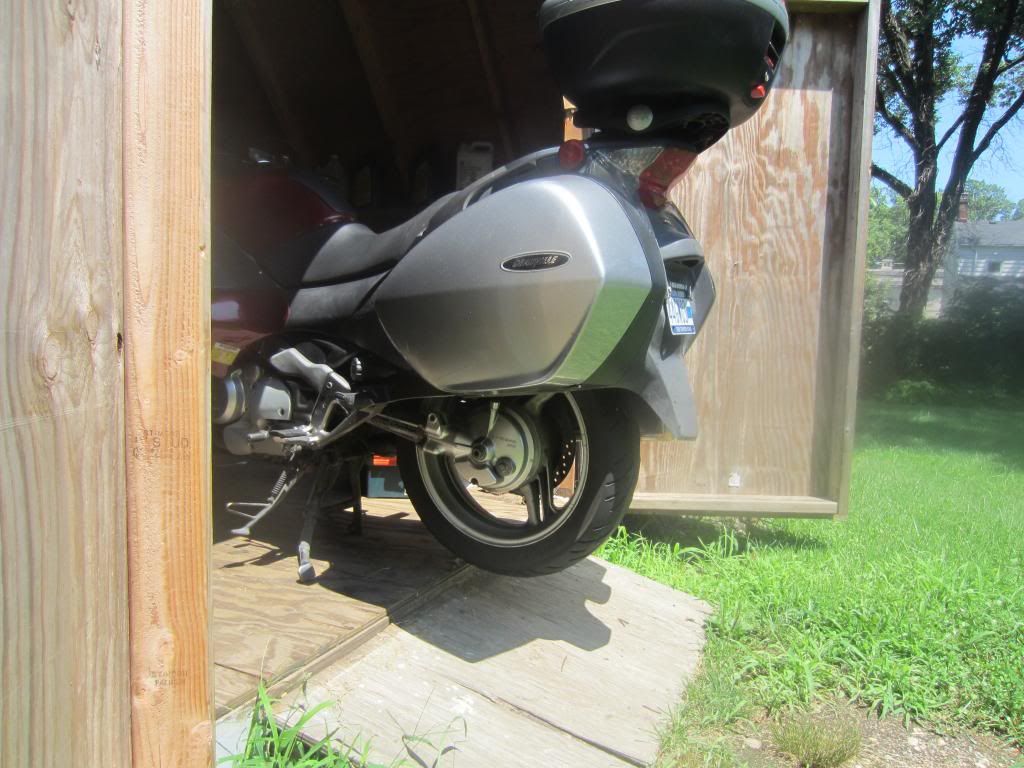
1. Place on lift, support the bike and drop rear wheel gate (or whatever method you use to get clearance).
2. Loosen exhaust system by taking nut from bolt near rear footrest (a large fender washer will probably fall out, so watch for it) and by loosening a bolt near rear brake pedal.
3. Loosen the axle nut, axle pinch bolt, and caliper assembly stopper bolts.
4. Remove axle nut and pull (or push) axle to the left enough so the caliper assembly can be rotated up and forward, pivoting on the stopper bolt.
5. Remove the collar from the dust seal by pulling it to the right. This will make room for next two steps.
6. Remove the pulse disk from the wheel (three torx bolts).
7. Remove the brake disk from the wheel (six bolts).
8. Remove the stopper bolt and rotate the caliper assembly toward the back of the bike until it can be laid over the top of the right axle support and fasten with string or cable tie.
9. Remove axle.
10. Wheel can now be moved to the right to clear the splines and dropped out of bike.

Be sure to torque everything you can according to specs when replacing the wheel, and use loctite where appropriate (especially the disk and pulse disk bolts, and double especially the stopper bolt).
 
Last edited:
Joined
Oct 29, 2011
Messages
1,230
Location
oregon
Bike
2011 NT, 01 Ultra, 04 VLX
You don't mention lubiing the rear wheel hub splines with moly lube, this shoud be done every time the rear wheel is removed REason is to keep spline weatr to a minumin.

Eldon
 

Coyote Chris

Site Supporter
Joined
Aug 25, 2011
Messages
4,437
Location
Spokane
Bike
10 Red NT 14 FJR, 17 XT
BillyDoc, how high does the lift have to get the bike off the ground. I am going to build a ramp and a platform with a removable section under the rear wheel. Is this procedure easier if you just unbolt the hub and take the wheel and hub off together?
 
Joined
Jan 6, 2011
Messages
1,951
Location
Aurora, Colorado
Bike
19 Versys 1K SE, 14 FJR
BillyDoc, how high does the lift have to get the bike off the ground. I am going to build a ramp and a platform with a removable section under the rear wheel. Is this procedure easier if you just unbolt the hub and take the wheel and hub off together?
If you take off the drive hub ie: pumpkin then you MUST do an alignment procedure when reinstalling, see service manual for this procedure. Please don't make the rear Wheel R&R any more difficult than it already is.
 
Joined
Jan 6, 2011
Messages
1,951
Location
Aurora, Colorado
Bike
19 Versys 1K SE, 14 FJR
6. Remove the pulse disk from the wheel (three torx bolts).
7. Remove the brake disk from the wheel (six bolts).
.
Not sure why you are removing these two items. I have never had to do that with any of the Honda Shafties that I have owned over the years. I have also removed my NT rear wheel three times now and have not found the need to remove the brake disk. Never did on my ST1100, which is the same drive set up as the NT nor on my ST1300abs over the last 10 years. Please enlighten
 

Coyote Chris

Site Supporter
Joined
Aug 25, 2011
Messages
4,437
Location
Spokane
Bike
10 Red NT 14 FJR, 17 XT
If you take off the drive hub ie: pumpkin then you MUST do an alignment procedure when reinstalling, see service manual for this procedure. Please don't make the rear Wheel R&R any more difficult than it already is.
Wow, didnt know about that! Maybe I should actually read the manual this winter.
 
Joined
Dec 14, 2010
Messages
2,007
Location
Tijeras, NM
Bike
1984 Moto Guzzi T5
That seems WAY too complex.

Just remove per the manual. It does take getting the caliper in JUST the right place to slip the wheel off and back on again.
 

olddy55

Guest
If you dont have a drop gate, than it is apparently neccessary to remove the rear fender as well. Their are two excellent You Tube videos on NT700V Honda rear wheel removal and rear fender removal (Soundtechguy). Apparently, rear fender removal is recommended by the Honda manual. Also, important to lube the spline and shaft when apart.
I just purchased the bike this past summer and intend on servicing myself.
Ken in Kamloops, BC
 
Last edited by a moderator:
OP
OP
Joined
Apr 7, 2012
Messages
70
Location
Pensacola, Florida
EX WINGER, my post was about removing the wheel, not what you do then. Of course you are right about the moly.

Coyote Chris, The point of using the drop gate on a lift is to avoid having to remove the rear fender, so I suppose the answer to your question is to measure the distance from the fender to the ground, and the diameter of the rear tire. The back of the bike would then need to be elevated by the tire diameter minus the fender clearance.

Others, on my ABS bike removing the two disks (brake and pulse) seemed by far the simpler approach. After trying for about an hour to wrestle the wheel out without removing anything . . . I gave up. But then, I'm an Old Phart and the brain ain't what it once was . . .

Bill
 
Last edited:
Joined
Jan 6, 2011
Messages
1,951
Location
Aurora, Colorado
Bike
19 Versys 1K SE, 14 FJR
Re: Removing rear wheel on ABS 2011 NT

Just a little tip. If one needs an inch or two of clearance for wheel R&R. Let the air out of the tire.
 
Last edited:
Joined
Dec 12, 2010
Messages
407
Age
74
Location
Huntington NY
Bike
2010 Red NT 700
Re: Removing rear wheel on ABS 2011 NT

I put my bike on the center stand with the rear wheel hanging out of my shed that gives enough elevation so I can drop the rear wheel directly without removing the fender. I've heard of people using curbs or any other mechanism to give you elevation. Removing the rear fender is an extra step to be avoided in my book.

 
Joined
Dec 14, 2010
Messages
2,007
Location
Tijeras, NM
Bike
1984 Moto Guzzi T5
I don't know why removing the fender is avoided. It is just a few allen head bolts and one phillips screw. Pops right out. Probably the simplest part of the entire process. Takes about three minutes, 10min if you use the cheap allen wrenches instead of the ratchet socket type.

Bill, once you figure out where to hold the caliper the wheel wiggles out just fine. It has to go forward, up and then to the side. I do wish Honda had made that one brake line just one inch longer and the wheel removal would have been MUCH simpler (like it is on non-ABS bikes). One day I may swap it out the line just for that reason.
 

Coyote Chris

Site Supporter
Joined
Aug 25, 2011
Messages
4,437
Location
Spokane
Bike
10 Red NT 14 FJR, 17 XT
I have a shed like that so I could do the same trick as long as I can get the dealer to agree to do the tire swap on the wheel the same day....but the fender removal procedure sounds good too. At least it is easier than building a platform with a ramp and removable section. And storing it.
 
Joined
Jan 14, 2012
Messages
464
Location
Leesburg, Virginia
Bike
2010 Silver NT700
I don't know why removing the fender is avoided. It is just a few allen head bolts and one phillips screw. Pops right out. Probably the simplest part of the entire process. Takes about three minutes, 10min if you use the cheap allen wrenches instead of the ratchet socket type...
Agreed. I didn't think removing the rear fender was that big of a deal. Very straight forward. Installing it was just as easy and straight forward.
 

junglejim

Site Supporter
Joined
Apr 26, 2012
Messages
2,128
Location
Northern WI
Bike
Tiger 800, NT sold
I just followed the proceedure in the Honda manual. Removing the extra parts isn't that bad. I'd build a ramp, but that's the easy part. Finding a place to store it in my garage is the hard part. I considered just lifting the bike with the loader on my tractor, but I didn't think that was the safest thing to do, even though I have done it before with other things when necessary.

Chris, if you can just sit down and read that manual, good for you. I have to see what I'm reading about in order to understand it.
 

rcase13

Guest
These are great suggestions. I should have followed them and taken the wheel to another member that has wheel mounting equipment. But I have been sick and was finally starting to get better and really wanted to ride the bike this weekend so I took it to the local dealer. I had previously bought PR3s and the originals were too far gone to use anymore safely. The dealer finished up in an hour and were very professional about it. At least I thought they were. I get home and being the anal person I am I loosened the pinch bolts and axle bolt to make sure they were done properly. Of course they were not. The pinch bolts were tightened way above spec. So much so that when I went to loosen one the head snapped right off with barely any force applied.

So I ordered four new bolts from an online parts place. I could just replace the one but I have to assume they over tightened all of them and stressed the bolts. Now I get the joy of removing the broken off bolt embedded in the aluminum shock. That should be fun... I am really kicking myself because I have a member right nearby with a nice new tire changing machine. Oh well I won't be going to that dealer any more. Honestly I don't think I will take the bike to the dealer for anything if I can help it. Valve check coming up at 8000. I think I will attempt it myself.

I have to agree with others it really wasn't much trouble removing the rear fender. At least it's not as bad as it looked.
 
Top Bottom