Yet Another Lowering Thread, via a shorter Rear Shock Eye

DirtFlier

Site Supporter
Joined
Dec 13, 2010
Messages
3,341
Location
Troy, OH
Bike
2010 Silver NT700V/ABS
I've touched down my boot edges a few times on sharp curves but nothing that alarmed me. I also did that on my previous bike. I don't know if my feet get any wetter with the bike lowered but that's only a guess. Being 5'6", the benefits of the lowered bike far outweigh any disadvantages, real or perceived.
 

Frosty

Site Supporter
Joined
May 25, 2011
Messages
603
Location
Spokane, WA
Bike
2020 Triumph 900GT
I used DirtFlier's plates yesterday to mount a Hyperpro lower shock eye. The spring compression was the part of the job that I had concerns about. DirtFlier is being modest when he calls them plates. With the addition of some threaded rod, 2 washers and 4 nuts, it is a very well thought out and well crafted tool. The spring compression turned out to be the easiest part of the job.

I tip my hat to Tosh and send his "plates" to the next member of the "Brotherhood of the Traveling Plates".


Attachments

OP
OP

kenstone

Guest
Frosty:

I might be the next in line for the plates as I have emailed DirtFlier and given him my address.
It would make sense for you to mail them to whoever is next to use them...except DirtFlier would never get his shipping cost back.

I'm in no hurry, and whatever DirtFlier wants to do is fine with me:D

Please post up any and all tips or shortcuts you used/discovered doing this mod, as this is the reason I started this thread:hat2:.
Anything you can add about the kickstand?

Plates look like angle iron to me:tongue:
Ken
 

DirtFlier

Site Supporter
Joined
Dec 13, 2010
Messages
3,341
Location
Troy, OH
Bike
2010 Silver NT700V/ABS
Ken,

Frosty is shipping the tools to you directly and not coming back to me until you're done. He's done with his shock so said he'd put the tools in the mail by Friday. Yes, the plates are angle iron - cheap, sufficient stiffness, and easy to drill/machine.

Tosh
 

Frosty

Site Supporter
Joined
May 25, 2011
Messages
603
Location
Spokane, WA
Bike
2020 Triumph 900GT
Ken,
I am going to the Post Office this afternoon.

Tosh is a better fabricator than I am as a photographer. The lower piece has a trap for the upper end of the shock and welded nuts for the threaded rod. The upper piece has a square hole to capture the lower shock eye. This was a very secure tool. Simple is even better.

I have reinstalled the shock but don't think I will be able to wrap things up before a we leave on a long trip.

Joe
 
OP
OP

kenstone

Guest
Good to know Joe,
Now I've got to finish what I'm working on now:run1:.
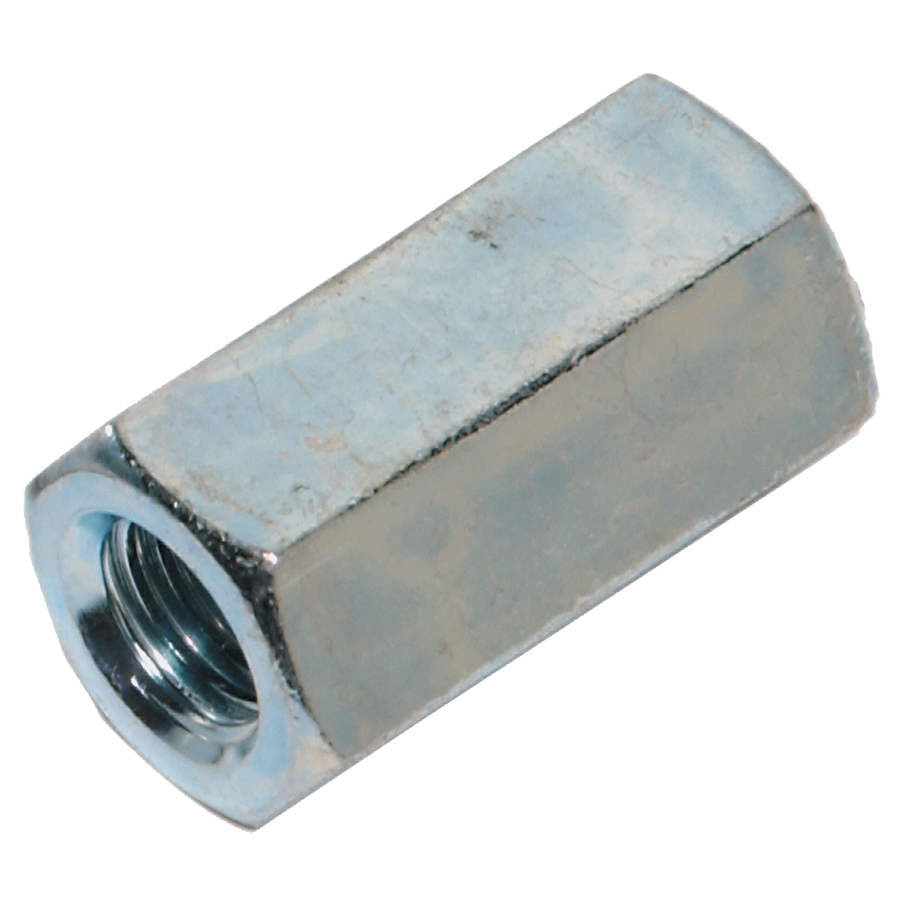
I'm thinking of using coupling nuts and cut the threaded rod shorter to also fit into that small mailer box :doh1:
Ken
 

DirtFlier

Site Supporter
Joined
Dec 13, 2010
Messages
3,341
Location
Troy, OH
Bike
2010 Silver NT700V/ABS
Ken,

I used the smallest Priority Mail box (postage $5.85) which is roughly 8" x 5" x 1-1/2" and the tools fit into that box. There was never any reason to make the tools larger so it was happenstance. The all-thread rod needs to be 14" long so would require a much larger box with cost being either $16.85 or $19.95. All-thread rod is fairly inexpensive and my guess is that anyone could buy the rod at their end and save money, plus have the rod at home for other projects once the tools were returned. Looking at Frosty's photo, I'd guess he bought a 3-ft section of all-thread and cut it in half, making each side 18" long.
 
Last edited:
OP
OP

kenstone

Guest
Most of the people I know, my age, know their way around hand tools but others may not:redface:.

I just thought the coupling nuts and shorter threaded rod (all thread) would make the tool a complete package.
Adding four, eight inch lengths of threaded rod and 2 coupling nuts would eliminate the trip to the store to get the all-thread, and the need of a hacksaw.


hello, my name is Ken, and I'm a tinkerer:redface:
have no plans to quit:D
and don't need no stinkin' 12 step program:eek1:
Ken
 
Last edited by a moderator:

Frosty

Site Supporter
Joined
May 25, 2011
Messages
603
Location
Spokane, WA
Bike
2020 Triumph 900GT
Ken,

I sent the tool yesterday and the receipt shows Fri as the estimated delivery.
I did buy a 3' piece of threaded rod from ACE Hardware . I cut 2 sections of 14".

If you split the threaded rod and used a coupling nut, I would use a lock nut on each side of the coupling nut. I used lock nuts on the welded nuts on the lower bracket. I only wanted one thread working on each side.

Good idea if having an entire kit is important. I think I spent $10-$12 on hardware (3' rod, nuts, washers). I will likely use the hardware again on other things (even the 8" scrap piece). Let us know how things go. My wheel is back on, but the "boss" has suspended all motorcycle work until return from family reunion.

Joe
 
OP
OP

kenstone

Guest
Oh yeh locknuts everywhere:smile:
On the 14th, I'm off on a spousal mandated trip as well :redface:

I'm building/modifying an ultralite trailer to haul a single MC thru the boring roads between here and places I want to go.
I'll put that aside, once the kit arrives, and plan to complete this NT mod before the trip.
Ken
 

Frosty

Site Supporter
Joined
May 25, 2011
Messages
603
Location
Spokane, WA
Bike
2020 Triumph 900GT
Finally finished lowering project. I am very happy with the result. I took the side stand to a welder. I told him that the desired end result was 20 mm shorter but same angles. I would not want it any shorter. Will post a comparison picture with another NT when able.
 

Attachments

OP
OP

kenstone

Guest
Frosty:
Thanks for the pic.
Did you have to fight with the kickstand spring, getting it back on?
ken
 

Frosty

Site Supporter
Joined
May 25, 2011
Messages
603
Location
Spokane, WA
Bike
2020 Triumph 900GT
Frosty:
Thanks for the pic.
Did you have to fight with the kickstand spring, getting it back on?
ken


No. I used your trick. Thank you! I inserted pennies (used 14) between the side stand spring(s) coils while in the down position (bike on centerstand). To keep them in place, I wrapped the spring/coins in thin cardboard and taped it. I removed the switch and removed the side stand lock nut. Once the bolt was unscrewed, I rotated the side stand up and springs came off when the side stand was removed. I simply reversed the process for reassembly. Did not have to fight the springs at all.
Joe
 

CommuterNT

Guest
[...in an older post on this subject it was mentioned that removing the rubber bumpers from the bottom of the seat will lower the seat 1/2"..."]

That's true and I looked into it initially but never made the change. Those bumpers are there to give the seat pan "soft" support and my concern was that direct contact between the frame rails and the plastic seat pan could eventually cause it to crack.
I just took the rubber bumpers out of the bottom of the seat and I have to say I'm very pleased. They pull out fairly easy but would be a bit trickier to put back in but can be done. It lowered my seat a 1/2-1" and definitely was noticeable. I didn't notice any difference in comfort or performance of the seat. If you are looking to get a little more foot on the ground I would give this a try as it takes 5 minutes to do and can be switched back easily.
 

DirtFlier

Site Supporter
Joined
Dec 13, 2010
Messages
3,341
Location
Troy, OH
Bike
2010 Silver NT700V/ABS
I've found the trick is to attach the spring BEFORE you put the sidestand into its frame tab. Having the additional leverage of the sidestand's length makes it loads easier. The downside is that often times, the side load created by the spring makes it difficult to start the pivot bolt. I've also done the same with the centerstand springs on other bikes.

An alternate method (since I lack pennies!) is to use "brake spring pliers" to get the spring on. These are from a bygone era when all cars had drum brakes and a part of every brake job was getting the return springs attached. The pliers have extra long handles and the tips are ground to fit over the spring post on the brake backing plate. When used on motorcycles, you slide the spring's j-end over the handle, fit the end over the spring loop on the sidestand, then pull back on the pliers and the spring will slide down the handle into the loop.
 
Last edited:
Top Bottom