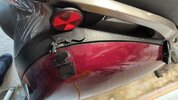
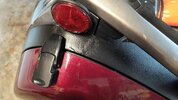
Well, I've repaired the latch damage on my right bag. I went an easier route, I think. I used 2 layers of modeling plywood, each with 4 layers in the wood, to make a support for the damaged plastic. I bent the plywood piece by steaming the wood and using a tourniquet to hold into place on a 3 lb coffee can to dry. The final piece ended up being 5 1/2" long, so I believe it has good support. I roughed up the underside of the plastic surrounding the damage and used a liberal amount of JB Weld to secure it in place. I then replaced the damaged plastic pieces, again with JB Weld and used a spray paint made for plastic to coat. Then secured the latch with wood screws. I think was much easier than removing a lot of pieces to repair and I still ended up with a solid mount.
Thanks for your advice Mike. I'm sure that was the "right way" , but I believe this will work just fine
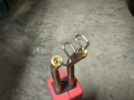
 I'm not going to bother to try to reinstall the spring at this time as I'm happy with my repair.