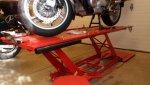
I spent the morning cleaning and servicing my ST700 (NT) from the Kansas BBQ trip that I took. While the bike was up on the lift, It dawned on me that I have never really truly inspected my Brake Pads for how much wear they had. Good thing that I did as the right front pads are going to need to be replaces soon. Will talk about why just the right front later. So I decide to take the pads out and inspect them for proper wear. I tried to do a pictorial of the procedure. Here they are as follows:
Picture 1: (sam 2487) Shows what I was looking at when I tried to visually inspect the pads on the bike. It was a bit difficult to see properly. (I am Old with glasses)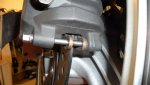
Picture 2 : (sam 289) Taking the Pad Pin out. You will need a 8 mm wrench. I used a 8mm socket and a 1/4 inch drive ratchet.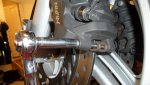
Picture 3: (sam 2490) Shows me pulling the pad pin out. As you can see the inner pad has already fallen out.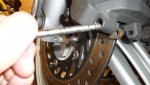
Picture 4: (sam 2491) Shows me removing the outer pad.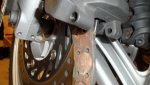
Picture 5: (sam 2492) Shows that I have plenty of material on the left pair of pads. Now to put the pads back in.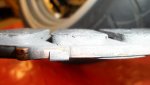
Picture 6 (sam 2494) This is the Pad Pin lube that I used. The service manual does not call for a lube on the Pad Pins but I put a very fine coat of brake lube on them.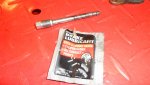
Picture 7 (sam 2495) I am making sure the caliper will move back and forth on the caliper slide pins, and is not binding. The fact that the pads have worn evenly also tells me the caliper is not sticking or jamming on the slide pins.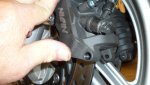
Picture 8 (sam 2496) I am trying to show that there is a notch that the pad must fit in as I slide the pad back up into the caliper. If the top of pad does not seat into this notch, the Pad Pin will not go in properly. You will know the pad is in the notch as there will be a springy feel when you line up the pad to receive the Pad Pin.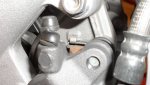
Picture 9 (sam 2498) I have inserted the outer pad and slid the Pad Pin in just partially through the outer pad to hold it in place while I get ready to insert the inner pad.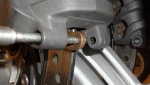
Picture 10 (sam 2499) Shows that I have inserted the inner pad and I know that it is seated into the upper notch by the fact I have a springy feel when lining it up to push the pad pin through it the rest of the way.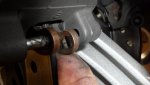
Picture 11 (sam 2503) the Pad Pin is pushed in and ready to be tightened up.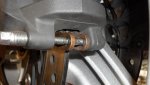
Picture 12 (sam 2504) The book calls for a torque of 13 foot pounds or = 156 inch pounds. Is it necessary to torque the Pad Pins? Lets just say I have just tighten them in the past and had no problems. I prefer to use the torque wrench when I have it available.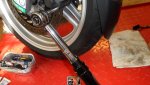
Picture 13 &14 (sam 2505 & 2506) Are the tools I used require to accomplish this 10 min task. I have done this with just a 8mm wrench on some of my other bikes. However that was in the field and not in my garage. The lift and stool are optional pieces of equipment.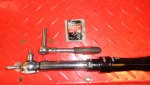
NOTE One: make sure you check both front Calibers. I found that the right side caliper pads were ready to be replaced and were a lot more worn than the left. The right pads were evenly worn so I know the caliper is working correctly and not binding. I attribute this wear pattern to my braking technique and the linked brakes. I use exclusively the front brakes. Very rarely use the rear brakes. If one studies the service manual it shows only two of the three braking pistons on the left front side engage when the hand lever is pulled. On the right side all three pistons engage when the hand lever is pulled. This puts more pressure on the right side pads, wearing them faster. When the rear break peddle is pushed the rear brakes are engaged and the center piston of the left front caliber is engaged. I very rarely use the rear brake. Just my technique.
NOTE Two: this is just to give a pictorial of how I preform this task. At all time I had the service manual next to me so I could refer to it. These pictures are NOT a substitute for using and READING the service manual.
Edit Note Three: The rear brake pad check is the same procedure but requires a 5mm Allen wrench, see last picture. (Sam 2509) It is a bit more difficult to remove the pads because of location. But for checking one can see the pads a lot easier then the front ones.
Edit Note Four: Always replace the front pads in pairs and try to do both the left and right side calipers at the same time if possible. Rear can be done at different time if necessary.
I hope this helps.
Last edited: