DirtFlier
Site Supporter
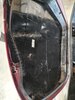
I've only had that meter cover off once and it was a pain to remove and it certainly felt and sounded as if things were breaking, but all was intact!
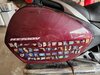
There are two cat eye slits in the meter cover and I installed 3 green LEDs behind each one as a reminder that my turn signals are ON because with the sun at my back, the turn signal arrows on the dash are impossible to see. My new/old CB500F has a tiny dash unit and it sit behind the headlight module so far, far from my old eyes.
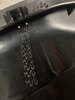
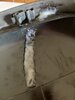
I will have to remove that meter cover to replace the right turn signal module which broke one of its mounting tabs and it's not a job I relish doing.
ps. it's best to work on tupperware when it's warm so the plastic is more pliable.
There are two cat eye slits in the meter cover and I installed 3 green LEDs behind each one as a reminder that my turn signals are ON because with the sun at my back, the turn signal arrows on the dash are impossible to see. My new/old CB500F has a tiny dash unit and it sit behind the headlight module so far, far from my old eyes.
I will have to remove that meter cover to replace the right turn signal module which broke one of its mounting tabs and it's not a job I relish doing.
ps. it's best to work on tupperware when it's warm so the plastic is more pliable.
Last edited: