Coyote Chris
Site Supporter
(Please correct or delete pics if I vilotated any copyright laws)
Prep. Read "Zen and the Art of Motorcycle Maintenance" to find out how SW-Motech came up with THEIR instructions....
1. Read this thread
http://www.nt-owners.org/forums/showthread.php?365-SW-MOTECH-Alu-Rack-Toprack-From-Twisted-Throttle
2. Print the first two pages of this
http://www.twistedthrottle.com/filemanager/download/2363/
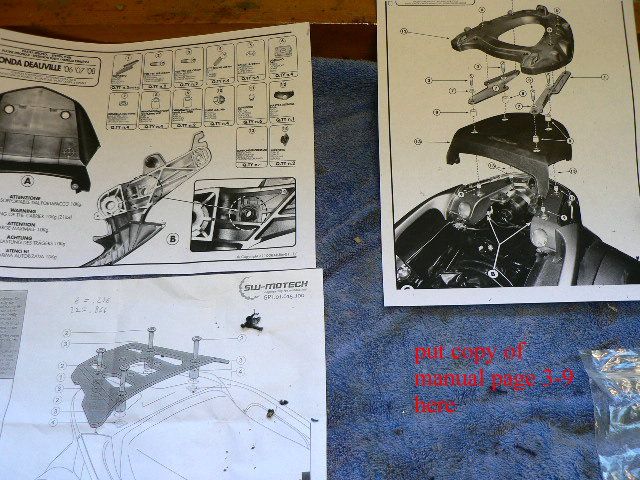
3. Lay out your paperwork, including a copy of page 3-9 of the manual
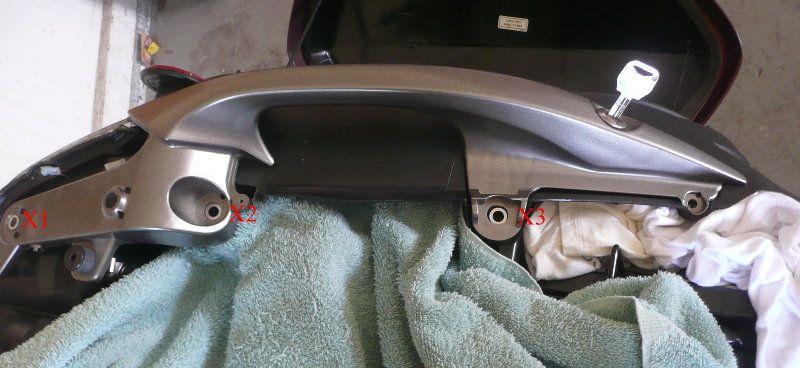
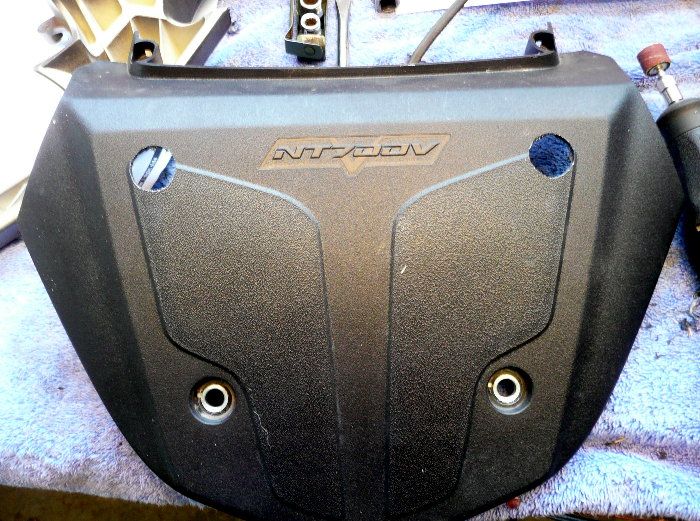
4. Put the bike on the center stand, remove the seat, and remove the "Grab Rail Center Cover"
The cover must be slid back 1/2 inch cause of the tabs on the bottom.
(BTW, "Grab Rail Center Cover is a euphamism for "Faux luggage rack to fool customer in showroom"
5. Remove the side rails. One rail will stay with the bike due to cable for lock.
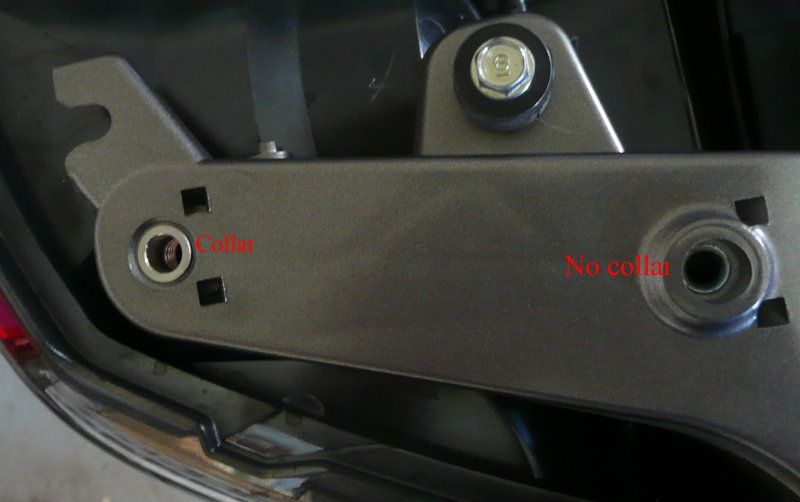
Note that collar X1 will come with the rails, Collar 2 and 3 will be loose.
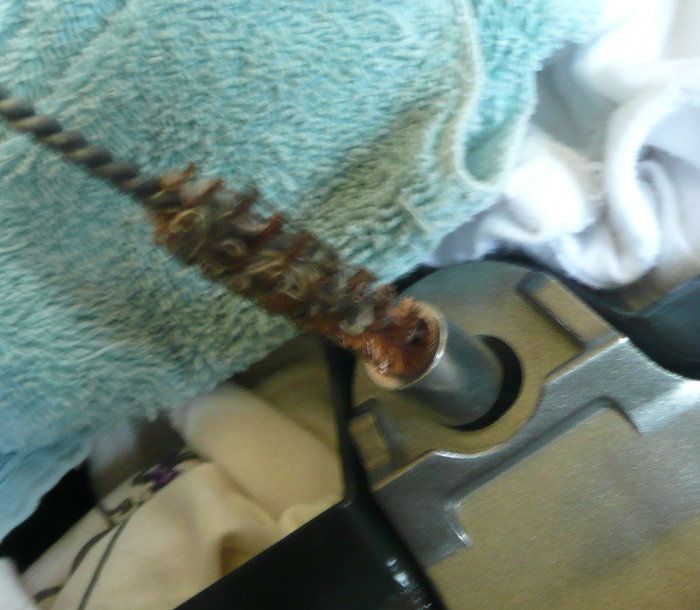
Shove in some rags to catch collars or remove the collars with a .45 cal bore brush
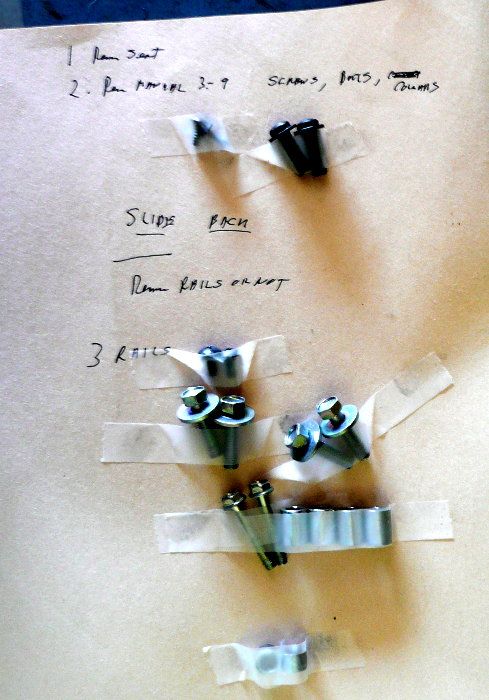
6. I like to tape my hardward to a piece of paper
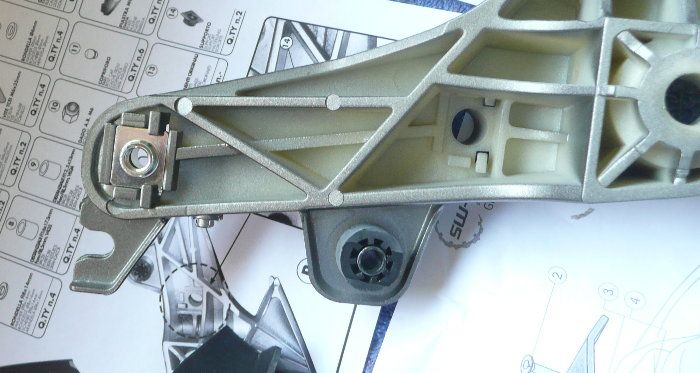
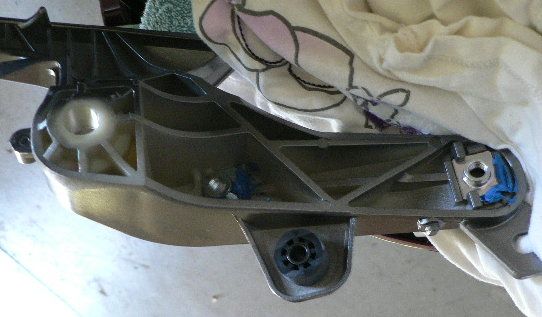
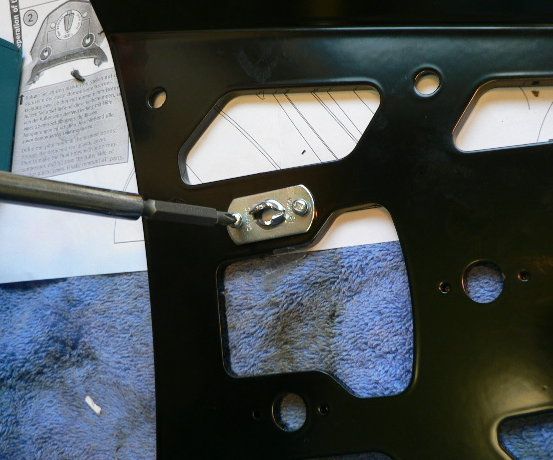
7. Snap in the inlay nuts and RTV them in. The rtv will give yet not let the nuts out. note that
one rail will be on its side due to lock cable. Collar will fall out.
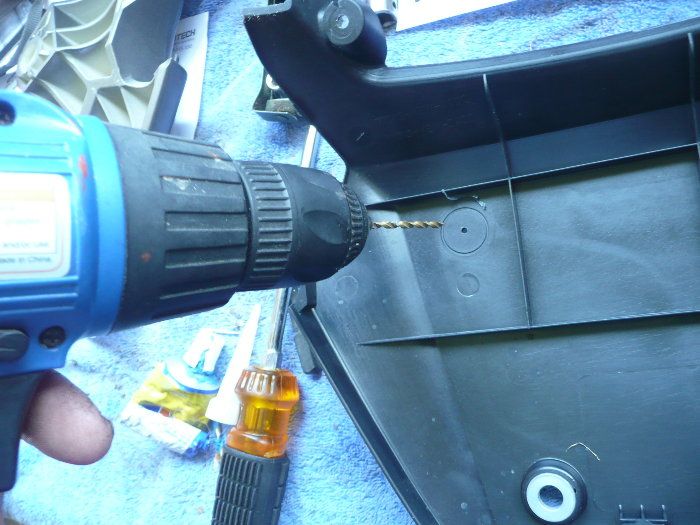
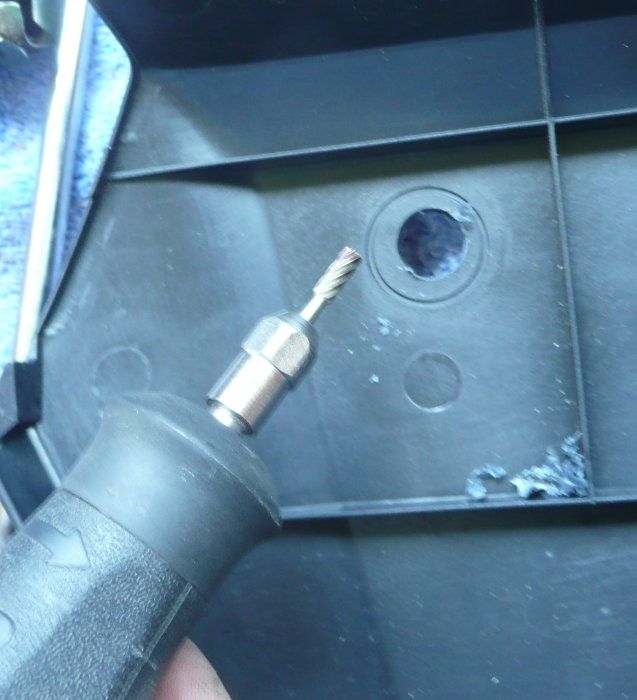
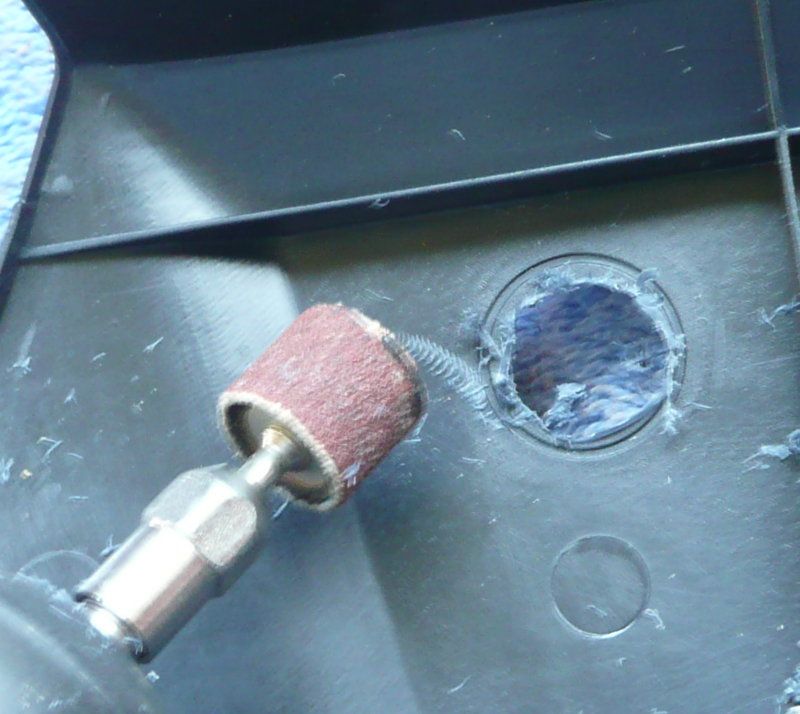
8. While you are waiting for RTV to set, drill, hog and sand out the thoughtfully provided hole templets
9. Put the rails back... the two new inlay nuts wont have collars on top of them.
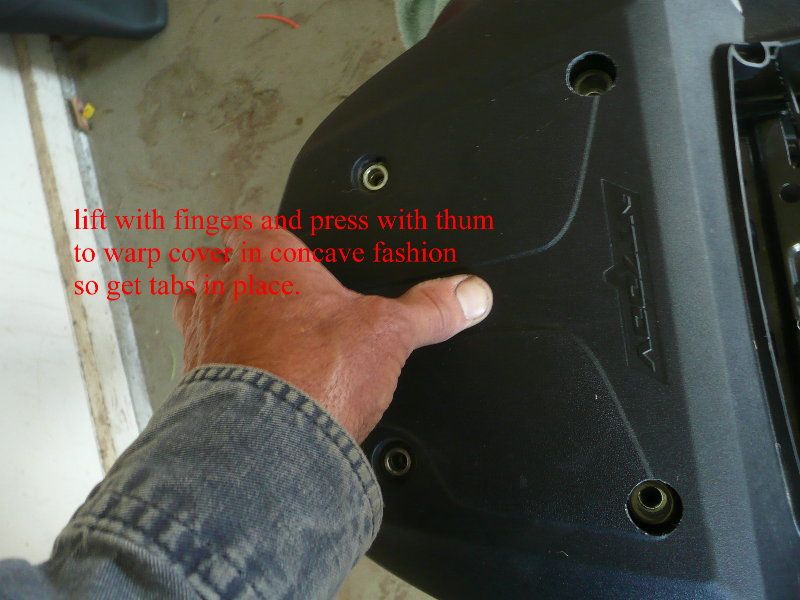
10. Put the cover back by flexing in in a concave direction using your fingers and thumbs. This will let you
Slide the tabs into their orfices
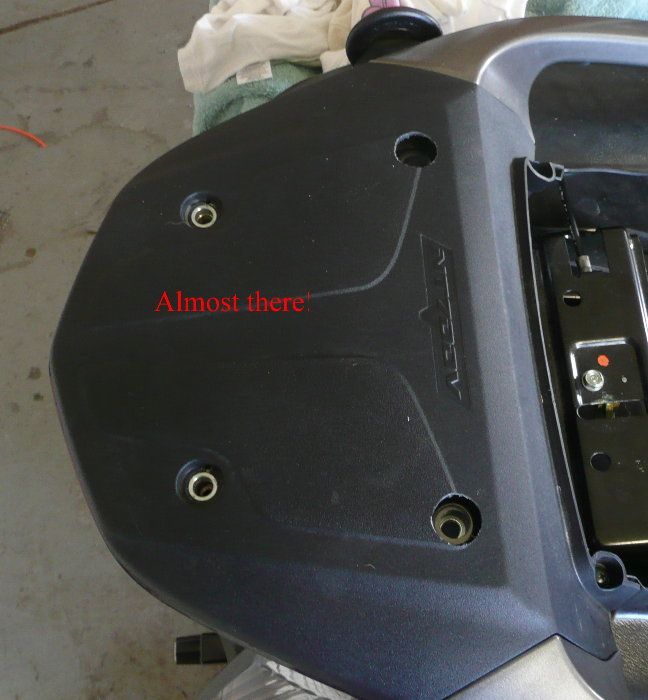
11. Put in the spacers. If you have the soft luggage adaptor, put the hardware for those in now.
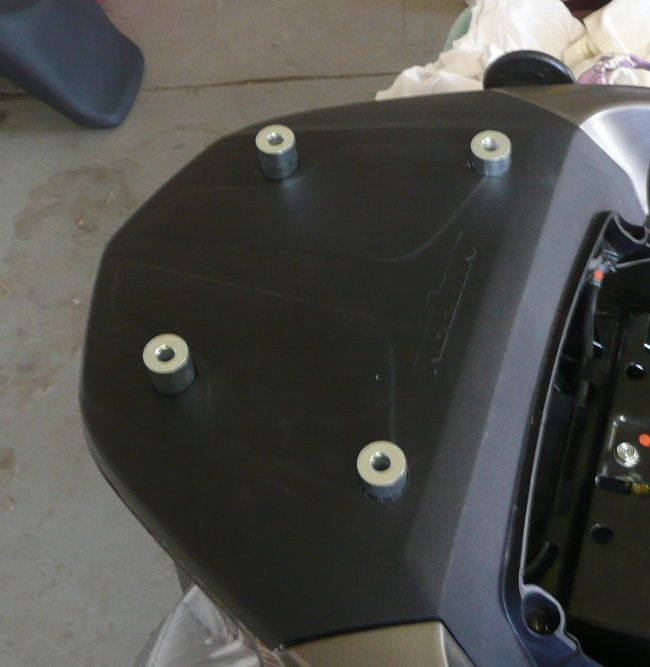
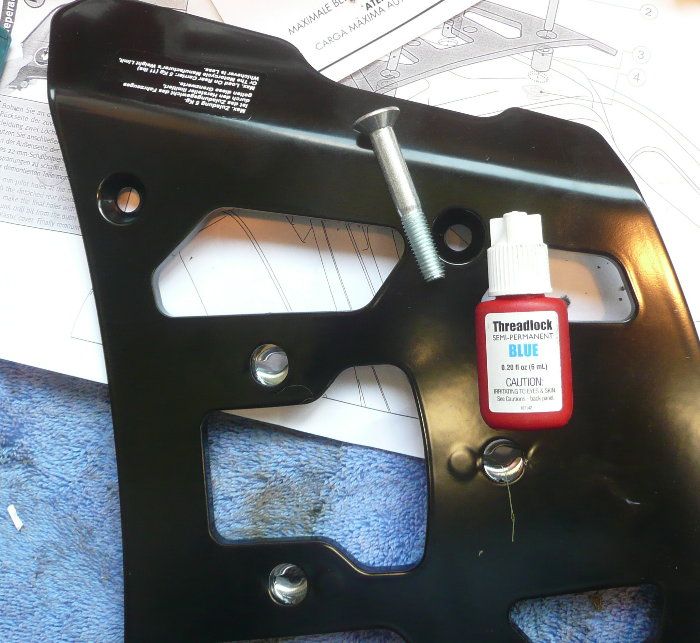
12. Use blue locktite on new bolts....almost home!
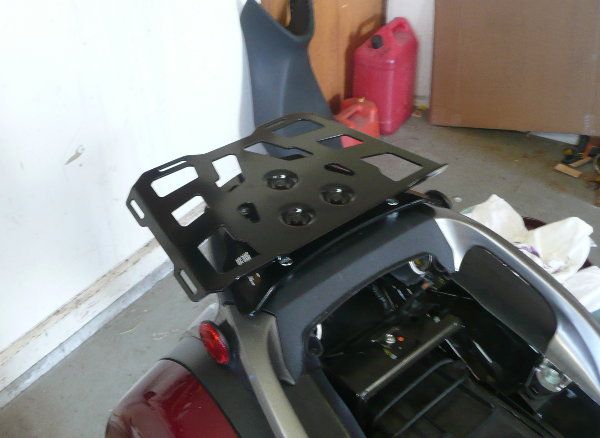
13. Torque the bolts to the flavor you like, twist lock on the soft luggage adaptor and you are there.
Prep. Read "Zen and the Art of Motorcycle Maintenance" to find out how SW-Motech came up with THEIR instructions....
1. Read this thread
http://www.nt-owners.org/forums/showthread.php?365-SW-MOTECH-Alu-Rack-Toprack-From-Twisted-Throttle
2. Print the first two pages of this
http://www.twistedthrottle.com/filemanager/download/2363/
3. Lay out your paperwork, including a copy of page 3-9 of the manual
4. Put the bike on the center stand, remove the seat, and remove the "Grab Rail Center Cover"
The cover must be slid back 1/2 inch cause of the tabs on the bottom.
(BTW, "Grab Rail Center Cover is a euphamism for "Faux luggage rack to fool customer in showroom"
5. Remove the side rails. One rail will stay with the bike due to cable for lock.
Note that collar X1 will come with the rails, Collar 2 and 3 will be loose.
Shove in some rags to catch collars or remove the collars with a .45 cal bore brush
6. I like to tape my hardward to a piece of paper
7. Snap in the inlay nuts and RTV them in. The rtv will give yet not let the nuts out. note that
one rail will be on its side due to lock cable. Collar will fall out.
8. While you are waiting for RTV to set, drill, hog and sand out the thoughtfully provided hole templets
9. Put the rails back... the two new inlay nuts wont have collars on top of them.
10. Put the cover back by flexing in in a concave direction using your fingers and thumbs. This will let you
Slide the tabs into their orfices
11. Put in the spacers. If you have the soft luggage adaptor, put the hardware for those in now.
12. Use blue locktite on new bolts....almost home!
13. Torque the bolts to the flavor you like, twist lock on the soft luggage adaptor and you are there.
Last edited:
