Pannier Latch Failure - Not Only The Lid Has This Issue

OP
OP
Brillot2000
Joined
Nov 7, 2017
Messages
1,300
Age
50
Location
Sun Valley, CA
Bike
NT700V, NC700X, XL600R
So many tempting bikes.

There is no perfect bike, is there.....which is why we need one of each.....
There is some truth in those statements. Also is "Different Strokes for Different Folks".

I also have a 2013 NC700XD DCT, which is a great bike. My inner engineering was intrigued by the DCT. A buddy of mine let me ride one and I really liked it. Then I went out and got one. NaNCy is my first Brand New bike that I ever bought.

Not to mention that I have a 1987 XL600R (Megas) that I built myself from a pile of parts too. The engine was shot, so I bought a lightly used XR600R of the same year and installed that engine into the XL frame. I also used the XR carburetors, which required some re-jetting, I got her closely dialed in. The bike setup to cruise down the highway at 80 MPH or putt along on some trail somewhere.

[video=youtube;FDRg49vzdxk]https://www.youtube.com/watch?v=FDRg49vzdxk[/video]

This is no perfect single bike out there. Sometimes we need a few of various combinations to bring us closer to that utopia.
 
Last edited:
OP
OP
Brillot2000
Joined
Nov 7, 2017
Messages
1,300
Age
50
Location
Sun Valley, CA
Bike
NT700V, NC700X, XL600R
Brillot, about how long did it take you to do one side? I'm still trying to get myself psyched up to do it.

Mike
Using the Installation Template that I created and uploaded to a different post. I was able to install the latch on the left saddlebag in about 20 minutes without removing it completely. I was able to do this before bedtime.

If you can fit your hand into the space behind the panel and between the existing latch assembly then you can do this way too. Prepare the aluminum backing plates. Place them behind the holes drilled using the template and them mark or lightly drill them to get your marks. Then drill the plates, install the rivets, lightly draw them up, finalize the desired positioning and draw the rivets completely. All is left is remove the latches from the lid and you're ready to go. It's that simple.

 
Last edited:
OP
OP
Brillot2000
Joined
Nov 7, 2017
Messages
1,300
Age
50
Location
Sun Valley, CA
Bike
NT700V, NC700X, XL600R
I forgot to mention if everyone decides to keep the latch assemblies in place. The cables to the latches will need to be removed.

If you do not do this, you will not be able to remove the ignition key from the lock when turned to the locked position. The latch has to be fully latched to release the cable in order for the key to be removed from the lock.


DirtFlier

Site Supporter
Joined
Dec 13, 2010
Messages
3,341
Location
Troy, OH
Bike
2010 Silver NT700V/ABS
Brillot2000 - was the curvature of where the lid joins the main saddlebag body a problem?
 
OP
OP
Brillot2000
Joined
Nov 7, 2017
Messages
1,300
Age
50
Location
Sun Valley, CA
Bike
NT700V, NC700X, XL600R
Brillot2000 - was the curvature of where the lid joins the main saddlebag body a problem?
The latch type I selected allows for angular misalignments due to the curving surface. The latch accommodates for this and mates up nicely.
 
Joined
Jun 14, 2015
Messages
159
Location
Michigan
Bike
2010 Silver NT700VA
Can you give us a slightly-more-at-a-distance picture so we can see how fugly.....or less-than-obtrusive....they are? :D

I really prefer the smooth, slightly-more-OEM look of the Southco latches. Too bad you have to mount them opposite of how they'd look best, due to the constraints of flat-ish real estate:
http://www.nt-owners.org/forums/showthread.php?10137-Pannier-latch-repair&p=138656&viewfull=1#post138656

But if the it comes down to what's the least fugly.....it's probably the Sugatsune.....
 
Joined
Jun 14, 2015
Messages
159
Location
Michigan
Bike
2010 Silver NT700VA
Well, here's the carnage after I took my saddle bags off....sorry for the just-a-bit-too-large picture sizes.....

Pannier removal album

It took me only about an hour to disassemble while taking pictures, since I'd done this once before.

The condition of my screw bosses is pathetic. Most of this damage was due to having taking these latches off and put back on before during latch cleaning and lubing. I have tons of experience with screwing into plastic, because I designed car interior panels for 18 years, so I was gentile and didn't over-torque (I though), and I've never seen bosses break this easily. The material code on both the lid and the case is >PC+PET<, which means a blend of polycarbonate and polyethylene. I'm familiar with PC and PC blended with other things, but not polyethylene.

Going in, my intention was to use JB-Weld and patch up and reinforce the screw bosses everywhere. But the damage is bad enough that I think I'm looking at external latches now.
 
OP
OP
Brillot2000
Joined
Nov 7, 2017
Messages
1,300
Age
50
Location
Sun Valley, CA
Bike
NT700V, NC700X, XL600R
Can you give us a slightly-more-at-a-distance picture so we can see how fugly.....or less-than-obtrusive....they are? :D

I really prefer the smooth, slightly-more-OEM look of the Southco latches. Too bad you have to mount them opposite of how they'd look best, due to the constraints of flat-ish real estate:
http://www.nt-owners.org/forums/showthread.php?10137-Pannier-latch-repair&p=138656&viewfull=1#post138656

But if it comes down to what's the least fugly.....it's probably the Sugatsune.....
FUGLY!!!


I do not think that they are. Yes, the Southco units are sleeker looking. However, I was not convinced that they will work as I did not have enough information to make a decision on going that route.

The latch's handle rotates 180°. Mounting them the other way would have created a possible collision issue. Besides, the latch's handle gives you something to hold on to and keep the lid under control while opening and closing.

I took a group of pictures this evening and posted in an online album, including wide angle shots that you requested. This album contains all the images that I took of the latches. Please use this link to view all my pictures, Brillot2000 - HONDA NT700V LATCH INSTALL.
 
Joined
Aug 27, 2017
Messages
4
Location
Midwest
Both of my latches failed. I did the jbweld reinforcement trick and both seem to be working ok...just hope they hold up.
 
Joined
Jun 14, 2015
Messages
159
Location
Michigan
Bike
2010 Silver NT700VA
Thanks Bruce. :) They don't look as bad from a distance. Up close they look.......like the hardware store latches that they are. :)

After taking my panniers off and seeing the destruction, I was pretty sure it would mean external latches for me. Then I came across this thread. See the last 2+2 pairs of pictures in the first post:
http://www.nt-owners.org/forums/showthread.php?11141-Latch-mechanism-post-redesign-(with-pictures)
I have one boss that was destroyed enough that I'd have to reengineer the standoff height. This reconstruction could take a while, and I've missed another week of short-Michigan-riding season already. The quick fix would be external latches.
 
OP
OP
Brillot2000
Joined
Nov 7, 2017
Messages
1,300
Age
50
Location
Sun Valley, CA
Bike
NT700V, NC700X, XL600R
Thanks Bruce. :) They don't look as bad from a distance. Up close they look.......like the hardware store latches that they are. :)

After taking my panniers off and seeing the destruction, I was pretty sure it would mean external latches for me. Then I came across this thread. See the last 2+2 pairs of pictures in the first post:
http://www.nt-owners.org/forums/showthread.php?11141-Latch-mechanism-post-redesign-(with-pictures)
I have one boss that was destroyed enough that I'd have to reengineer the standoff height. This reconstruction could take a while, and I've missed another week of short-Michigan-riding season already. The quick fix would be external latches.
I am quite proud of myself for going from a problem to a solution over a weekend as this bike is my daily driver. I may look at Southco or other latches in the future. For now, these will do.

Quite honestly I have never seen these kinds of latches in any hardware store. Of course, the Hardware Store is dying and on the endangered species list here in So Cal. At best only thing that could be found that would work would be some paddle lock hasp and using a couple paddle locks.
 

MCG

Joined
Apr 3, 2016
Messages
8
Location
Massachusetts
Bike
2010 Silver NT700
Has anybody used latches from the old concours (C-10) bags? I have a source for them (no, I'm not going to steal the ones from DH's bike) and was wondering if anybody else used these.

Maryann
 
Joined
Jan 23, 2011
Messages
1,293
Location
Arkansas
Bike
2020 Kawasaki Versys
I don't know of anyone using C-10 latches. I remember them being sort of wide. That may make it more difficult to put on the NT's curvy surface.
Just a thought.

Brad
 

Fieroguy

Site Supporter
Joined
May 9, 2012
Messages
154
Location
Milford, PA
Bike
2010 Silver NT700
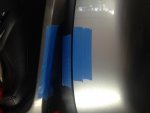
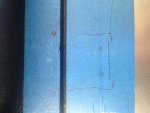
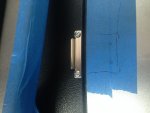
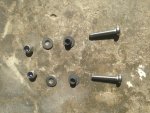
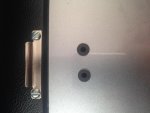
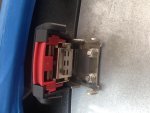
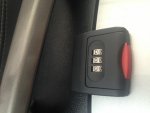
My turn... Prior to making my recent 1700 mile trip, I decided to take out a little insurance policy and (finally) install the Franzen latches I bought from a forum member. Even though my stock Honda latches had not completely failed yet, I didn't want to end up having to tape, strap or do some other emergency repair while on the road. My other thought was that this might help the stock latches last longer, having not strain on them when in transit. Well... it's a theory, anyway. Here are pics of the install showing Tape Up, Layout, Latch, Hardware (leftover parts from a Garmin mount), Holes drilled, Bolts, Completed Install, Underside of lids (2). Note that I couldn't get the washers on the bolts due to lack of clearance, but feel confident in the grommets doing their job.
01 Tape Up.jpg
02 Layout.jpg
03 Latch.jpg
04 Hardware.jpg
05 Holes.jpg
06 Bolts.jpg
07 Completed Install.jpg
08 Bolts underside in lid.jpg
09 Bolts underside in lid 2.jpg
Note that the Franzen latches have a lot of plastic pieces. I am somewhat concerned about their ability to hold up for the long haul, but they performed adequately on my trip and gave peace of mind. I'm much more impressed with the 'all metal' appearance of the latches posted in this thread, so may be converting to those further on down the road.
 

mikesim

Site Supporter
Joined
Jun 7, 2011
Messages
3,363
Age
74
Location
Union, MO
Bike
NT700, Red, #989,
In figure 3 you show the "latch" mounted on the black saddlebag housing. How did you fasten that part and did you have to access the underside to reinforce the plastic? Also, how did you determine the drilling location for the holes? Template? Guess? Eyeball?

Mike
 

Fieroguy

Site Supporter
Joined
May 9, 2012
Messages
154
Location
Milford, PA
Bike
2010 Silver NT700
Hi Mikesim, Thanks for your question. Not sure if technically, that part is called a "latch" or a "catch"(?). Let's call it the catch. I have to admit there was a fair amount of guesswork involved, but, thanks to the contributors of this forum, I saw other pictures of this same latch installation showing the 'catch' being at the very edge of where the black part of the pannier assembly meets the lid. The same held true for the 'latch' location as well... just line it up to the very edge of the lid. Once the latch was laid out on the masking tape, I lined up the 'catch' and marked it up on the tape. I then used an awl to start the holes and give the drill bit some guidance. I used a relatively small drill bit. Don't laugh, but I didn't have much time (this was a last minute decision to install prior to leaving for my 'epic' 1,700 mile ride) so I simply used a couple of small sheet metal screws into my pilot holes. I have to admit, I was surprised at how well they tightened up and have held up beautifully on the trip. I attribute that to using such a small drill bit so there was plenty of plastic for the screws to bite into. May have to revisit this someday, but fine for now. As others have stated, that area where the backside of those screws goes is practically inaccessible short of performing major disassembly.
/Larry
 

Fieroguy

Site Supporter
Joined
May 9, 2012
Messages
154
Location
Milford, PA
Bike
2010 Silver NT700
One final thought... I originally thought about aligning the latches so they draw the lid in tighter. I am glad I didn't do that for two reasons; first, I believe it would have squished the weather seal more and would possibly compromise it over time or even cause it to fail due to over compression. Those Honda engineers knew what they were doing, right? Lol. Second, if I had done that, my screw holes for the lid would definitely have been into the plastic 'wall' instead of just the other side of it.
As it is, the lids ended up being in the exact same location as stock when latched.
/Larry
 
Joined
Jun 14, 2015
Messages
159
Location
Michigan
Bike
2010 Silver NT700VA
Nice job. I like the width of those latches....offering a bit more stability than a single catch point.
 
Top Bottom