I couldn't agree more, Hondas are typically very well engineered vehicles, things are done certain ways for good reasons, leave things the way they're intended to be, and drive 'em a bazillion miles!There must be a reason for the direction used, so I would not mess with it. It is not obvious why Honda did it that way, but I'd prefer not to discover why when riding it. ;-)
Easy rear wheel removal - no exhaust removal needed
- Thread starter harryhendo
- Start date
- Joined
- Jun 16, 2019
- Messages
- 545
- Bike
- 2010 NT700V
Just made a separate topic about this thing, but might as well post it here too.
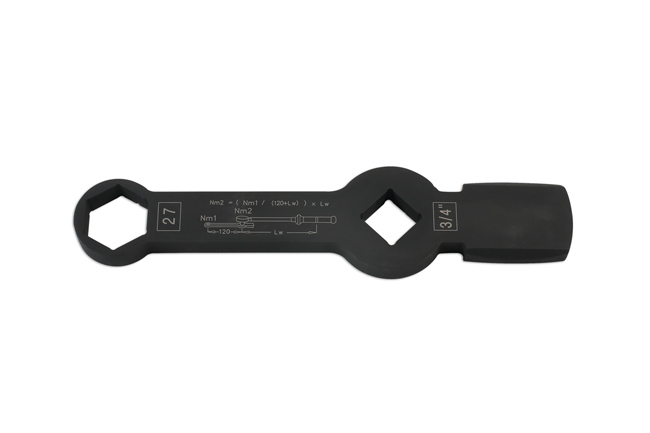
Laser Tools 7343
If you want a 1/2" drive, just use a low profile 1/2"F to 3/4"M adapter.
Laser Tools 7343
If you want a 1/2" drive, just use a low profile 1/2"F to 3/4"M adapter.
ARES 70198 - Low Profile Impact Socket Adapter Set - Impact-Rated Heat-Treated Chrome Vanadium Steel Features Knurling For Enhanced Grip - - Amazon.com
ARES 70198 - Low Profile Impact Socket Adapter Set - Impact-Rated Heat-Treated Chrome Vanadium Steel Features Knurling For Enhanced Grip - - Amazon.com
www.amazon.com
HELP! I changed to Pilot 4 tire, lubed splines but cannot get rear brake caliper back on. Bike on center stand with fender removed. Trying to align caliper seemingly impossible to get over disc. What am I doing wrong? Not having bike high enough? Remove saddle bag? Tried various positions with caliper to no avail. Russ Foster Dallas
DirtFlier
Site Supporter
I always use tapered wooden shims, the type contractors use to shim windows & door frames, and drive one into the gap where the disc usually fits, then remove it. It's an easy and non-damaging way to drive the pistons back into the caliper and provide more clearance. Just remember to tap the brake pedal or lever to push the pads back to their normal position before riding!
I learned long ago that the easiest way for me to remove/reinstall the rear wheel was to remove the right saddlebag lid and body. With that gone, you can SEE everything! At least for me, it adds about 25-min to the job.
I learned long ago that the easiest way for me to remove/reinstall the rear wheel was to remove the right saddlebag lid and body. With that gone, you can SEE everything! At least for me, it adds about 25-min to the job.
Last edited:
OP
OP
Make sure the wheel is fully seated on the spline (it takes a bit of jiggling), and also press the brake pads into the caliper a bit to gain some clearance (as ARKNT and DirtFlier said).HELP! I changed to Pilot 4 tire, lubed splines but cannot get rear brake caliper back on. Bike on center stand with fender removed. Trying to align caliper seemingly impossible to get over disc. What am I doing wrong? Not having bike high enough? Remove saddle bag? Tried various positions with caliper to no avail. Russ Foster Dallas
DirtFlier
Site Supporter
With the rear wheel in place but unsecured, if there is a gap from the wheel hub to the final drive case, the wheel is not fully seated. Another indicator of it being unseated is that the spacer on the right side of the bike won't fit.
In ref to "seating the pads," I once walked my bike off the lift and forget that I'd pushed the caliper pistons back. It scared me as the bike rolled backwards at a fair pace and my pulling on the front brake lever did nothing! Luckily my garage door was open so I had 30-35 feet to get it stopped!
In ref to "seating the pads," I once walked my bike off the lift and forget that I'd pushed the caliper pistons back. It scared me as the bike rolled backwards at a fair pace and my pulling on the front brake lever did nothing! Luckily my garage door was open so I had 30-35 feet to get it stopped!
ST1100Y
Site Supporter
- Joined
- Nov 7, 2020
- Messages
- 600
- Age
- 59
- Location
- Vienna, AuSTria, Europe
- Bike
- ST1100Y, ST1100R, NT700
The RHS pannier has a recess for handing the caliper...
Got me this tool to push the pistons in...
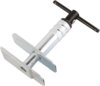
Got me this tool to push the pistons in...
I laid out several 2/4's and drove the bike up on top so that I had the front wheel, rear wheel, and center stand each on 1 board (1 1/2" high). I then raised the bike on the center stand and removed the boards under the tires so that the bike was on the center stand with the front wheel back on the ground. This raised the rear about 4" above the ground. I removed the lower mounting bolt for the rear shock and and let the rear wheel come down to ground which lowered the axel nut and brake caliper bolt below the exhaust so you can access them directly with a standard socket wrench. I removed the rear fender first to make it easier to see, and that may or may not have been necessary to get the wheel out. The whole process took maybe 30 minutes as it was my first time, but I am quite sure I could do it in 5-10 minutes next time.
Thanks to all for help. I realized I had NOT put additional boards under center stand last time and that was likely that reason I did it last time. I will try both additional boards AND taking saddle bag off and report. This forum sure helps. Now we need the yearly meeting in MO. Russ
Help Help again, I followed good advice and took off right saddle bag: MUCH easier and could install wheel, alignment, etc. After putting it all together wheel would not turn.
1. Took drive shaft apart. Shaft would turn, shaft turned inside rear gear. Aligned U joint after moving boot. half hour of alignment to make sure shaft aligns going into rear axel housing ( 5/16 gap between 4 bolts going into axel/swing arm housing) which would require about 100 lbs torque to close. Suspect something is holding shaft. Only 3/8 of axel treads show going into axel housing
2. I am thinking something is blinding the drive shaft and thus wheel is locked up. Have carefully mated up shaft with forward u joint via flashlight and holding u joint
What am I missing? If everything is moving but not after shaft is attached something must be binding where shaft goes into axel. Help .
Russ
You got an assembly error somewhere, at this point I would back out and take the rear wheel off, there is a spring at the back end of the drive shaft that pushes the driveshaft forward towards a U-joint, its purpose is to take the slack out of the splines and keep the U-joint from shuttling forward and backwards. The spring is pretty strong, but it should not prevent you from closing the gap between the final drive housing and the swingarm. Perhaps the spring got turned sideways during disassembly. In either case you need to get the final drive bolted to the swing arm properly, and spinning, before proceeding. Take the driveshaft out of the front of the final drive and check the spring if you have to.Help Help again, I followed good advice and took off right saddle bag: MUCH easier and could install wheel, alignment, etc. After putting it all together wheel would not turn.
1. Took drive shaft apart. Shaft would turn, shaft turned inside rear gear. Aligned U joint after moving boot. half hour of alignment to make sure shaft aligns going into rear axel housing ( 5/16 gap between 4 bolts going into axel/swing arm housing) which would require about 100 lbs torque to close. Suspect something is holding shaft. Only 3/8 of axel treads show going into axel housing
2. I am thinking something is blinding the drive shaft and thus wheel is locked up. Have carefully mated up shaft with forward u joint via flashlight and holding u joint
What am I missing? If everything is moving but not after shaft is attached something must be binding where shaft goes into axel. Help .
Russ
Since you had the final drive case removed from the swing arm, you must leave the final drive mounting nuts slightly loose until the axle has been properly torqued. The axle will Center the final drive properly on the swing arm if you do this correctly, and eliminate a binding possibility there, when the axle is torqued and the rear wheel is verified to spin freely, then you can tighten the final drive mounting nuts.
Like heli nut said work your way back. Verify the driveshaft and final drive case are free then move on to wheel install. Are the thrust bearing/washers in the wheel installed correct? I'm sure you have checked the transmission is in neutral. After wheel install there should be no binding and small gap from final drive case to rear wheel.
Arknt
Arknt
OP
OP
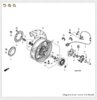
Sounds like a spacer or damper is not installed properly. The wheel should just slide onto the shaft drive housing. I found this picture very helpful to see the sequence and orientation of the different parts.
I would like to warn members that I had the lower shock absorber bolt shear whilst riding the bike (2008 NT700)
when it had about 35,000 miles on it. It had never been disturbed. I was lucky that I had gone into a local ex-Honda shop for tyres and the mechanic spotted the shiny part of the bolt. An engineer friend said it had either been overtightened at the factory or the thread cut too deep.
I let Honda UK know at the time on the basis of you may want to get your dealers to replace these as a recall (about £5 a bolt at the time), but they wanted ME to spend over a hundred pounds having the bike inspected by their dealer.
Thanks for all, especially Ark and Harry but I gave up and am taking it to the Honda shop. I realize I will likely be banned from forum. This is a first after 40 years of doing it all myself. The shop thinks it is in the axel and not accepting the shaft. I will post the result for all to learn from my mistakes. Russ
Russ, don't worry about taking your bike to the shop. I did all my own work on my two Kawasaki Concours, but I haven't done anything to the NTs except one or two oil changes way back in the beginning. I no longer have the dexterity to handle tools. The one project I attempted was installing my Clearwater Darla driving lights on Horse (my current NT). I probably doubled the cost of the installation by the things I screwed up!Thanks for all, especially Ark and Harry but I gave up and am taking it to the Honda shop. I realize I will likely be banned from forum. This is a first after 40 years of doing it all myself. The shop thinks it is in the axel and not accepting the shaft. I will post the result for all to learn from my mistakes. Russ
Like ARKNT said, we aren't a judgmental bunch. We've got some who are great mechanics and others use a less specialized tool -- the credit card.
$96.39 is the final answer to alignment problem. Al Lamb's Honda in Dallas. While mech had already left the guys said he just put it back together and figures the shaft did not engage with front ujoint enough. Well, I had finger on joint and sighted down tube and thought I had it in correctly. Evidently shaft will turn ok if it is not engaged completely. For shame for shame as Gomar would say. Hope this may help some others. Russ