OP
OP
Here are follow up pictures to the previous video.
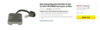
Simple Drop-In Replacements.
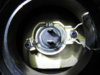
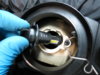
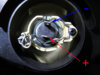
A perfect fit deep inside the cavity. The stock dust covers can be used with these.
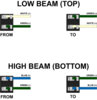
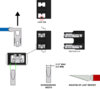
These bulbs are "Polarity Sensitive", they will not work if the polarity is reversed.
High Beam is on the bottom.
Low Beam is on the Top.
Let me know if you have any further questions regarding these LED Replacement Bulbs.
AUTENS LED Headlight Bulbs H7 Headlight Conversion Kit 6000 K - Amazon $43
Simple Drop-In Replacements.
A perfect fit deep inside the cavity. The stock dust covers can be used with these.
These bulbs are "Polarity Sensitive", they will not work if the polarity is reversed.
High Beam is on the bottom.
Low Beam is on the Top.
Let me know if you have any further questions regarding these LED Replacement Bulbs.
AUTENS LED Headlight Bulbs H7 Headlight Conversion Kit 6000 K - Amazon $43
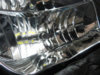
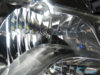
") and the light look awesome ... the beam patern and cut off look good to me
and the light look awesome ... the beam patern and cut off look good to me